Chainmail VRChat Avatar
Overview
I have always enjoyed VRChat for both the creativity on display and the unique social experiences it allows. Ever since I started learning 3D modelling for chainmail, I have thought about making a custom avatar made of individual rings. With my other project blocked by shipping delays, I thought that it was a great time to make a chainmail-inspired VRChat avatar. I ended up making this free avatar. Read on to learn more about how I made it.
Materials
For this project, there were no physical rings involved; instead, I used the following programs:
Notes
Coming Up With The Idea
Originally, my plan for this month was to make chainmail coasters (coming next month). However, shipping delays on the ordered rings made it impossible to release this month. Without the ability to buy rings, I had two choices: make coasters with the rings I have on hand or find another project. Since I didn’t have enough rings on hand to make anything interesting, I spent some time thinking about what to make. After some time thinking about what I could make without rings, I remembered my previous idea of making a custom VRChat avatar from rings; this was a perfect project given my current constraints and something I have wanted to do for a long time.
Making My First Avatar
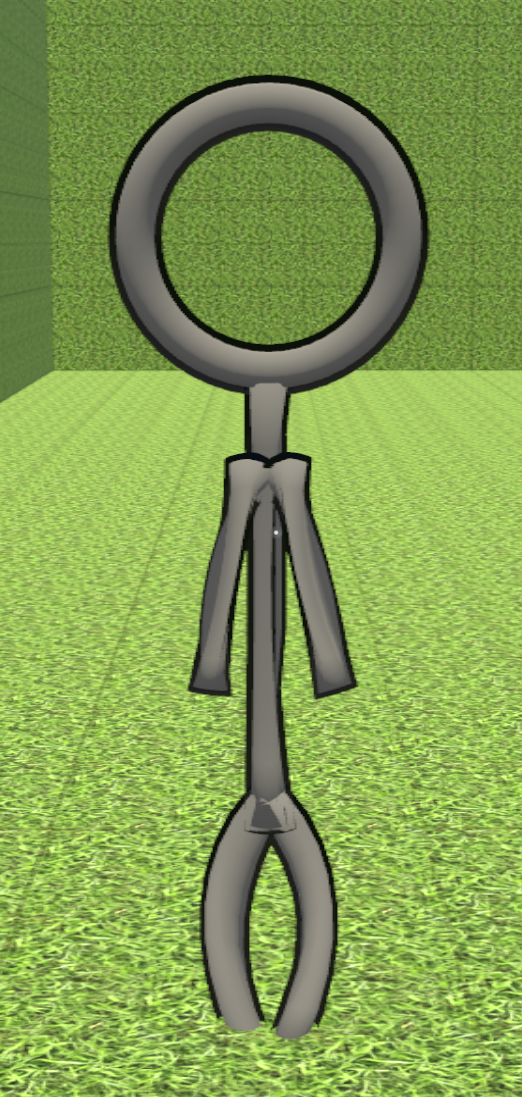
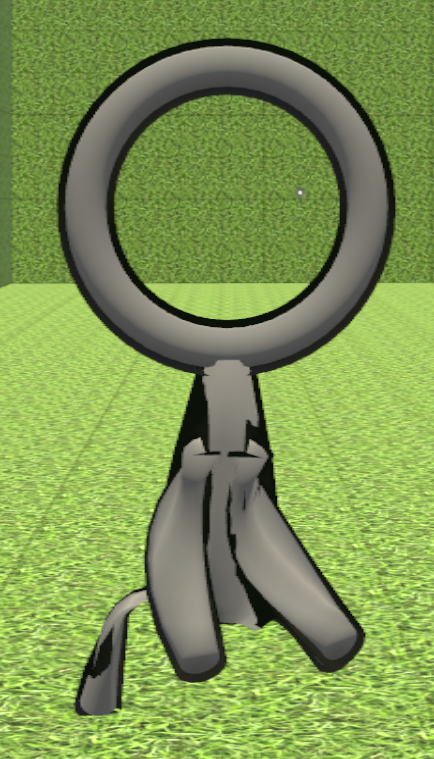
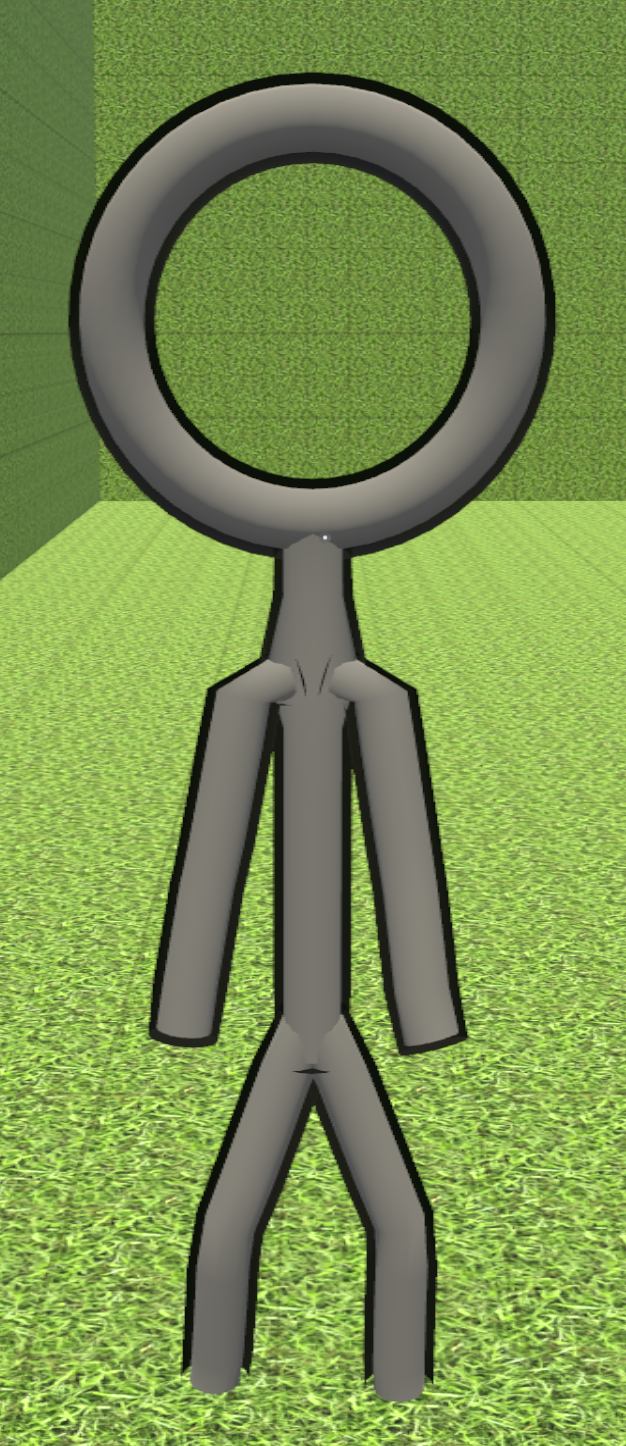
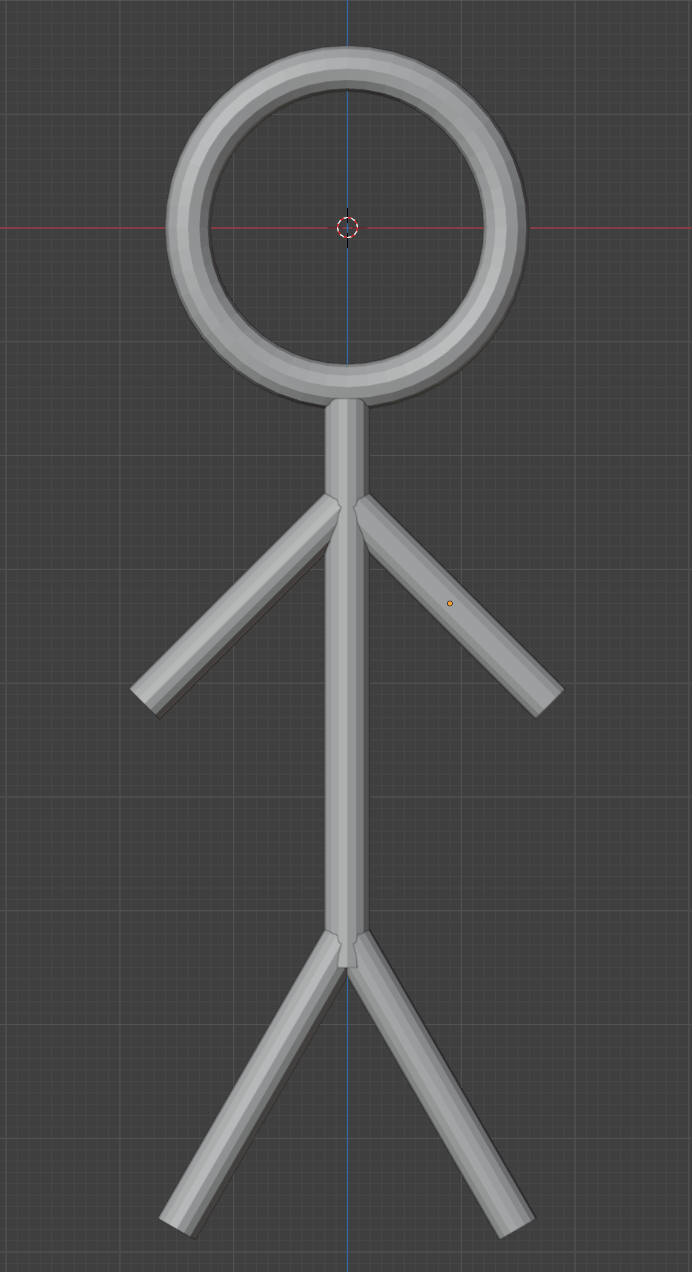
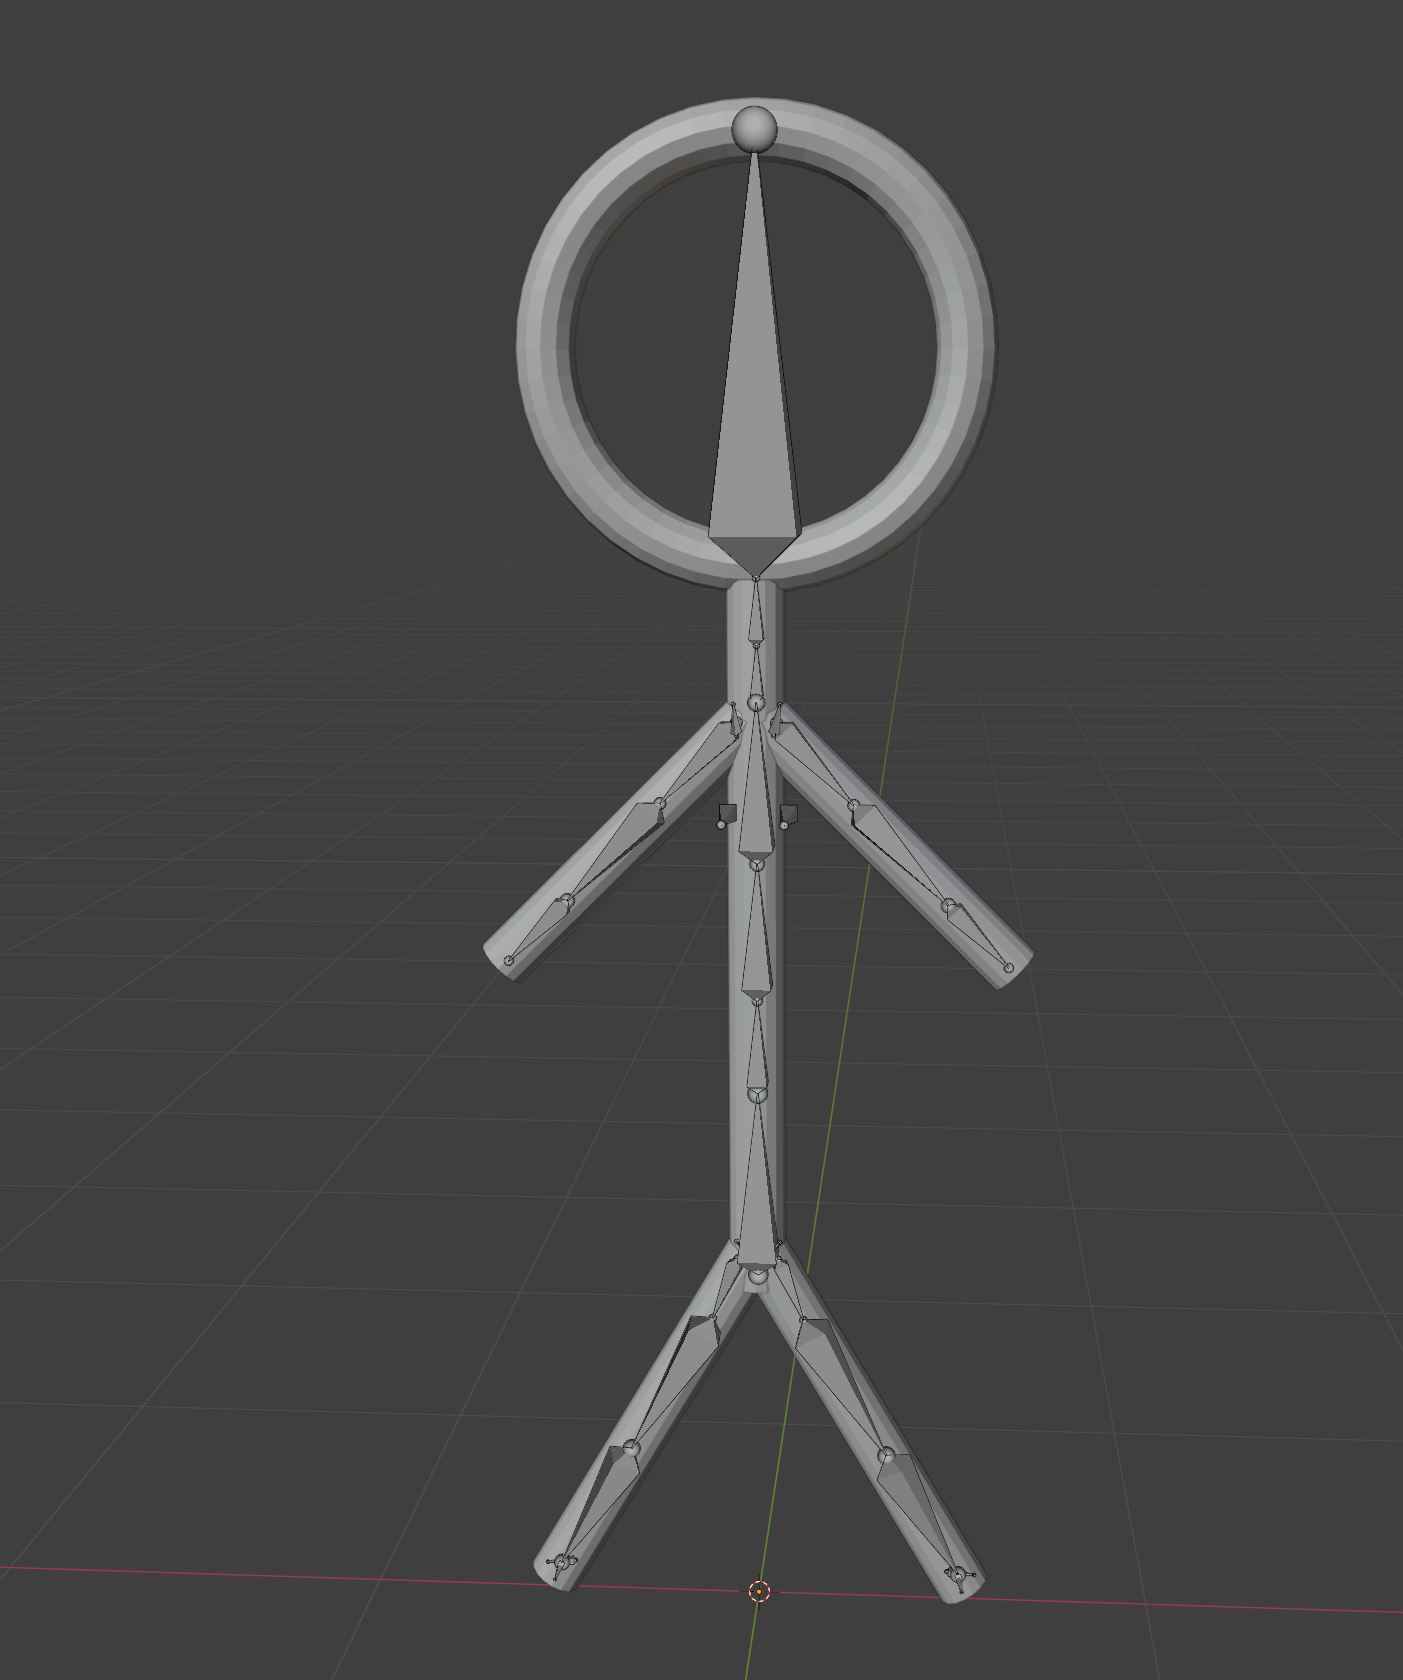
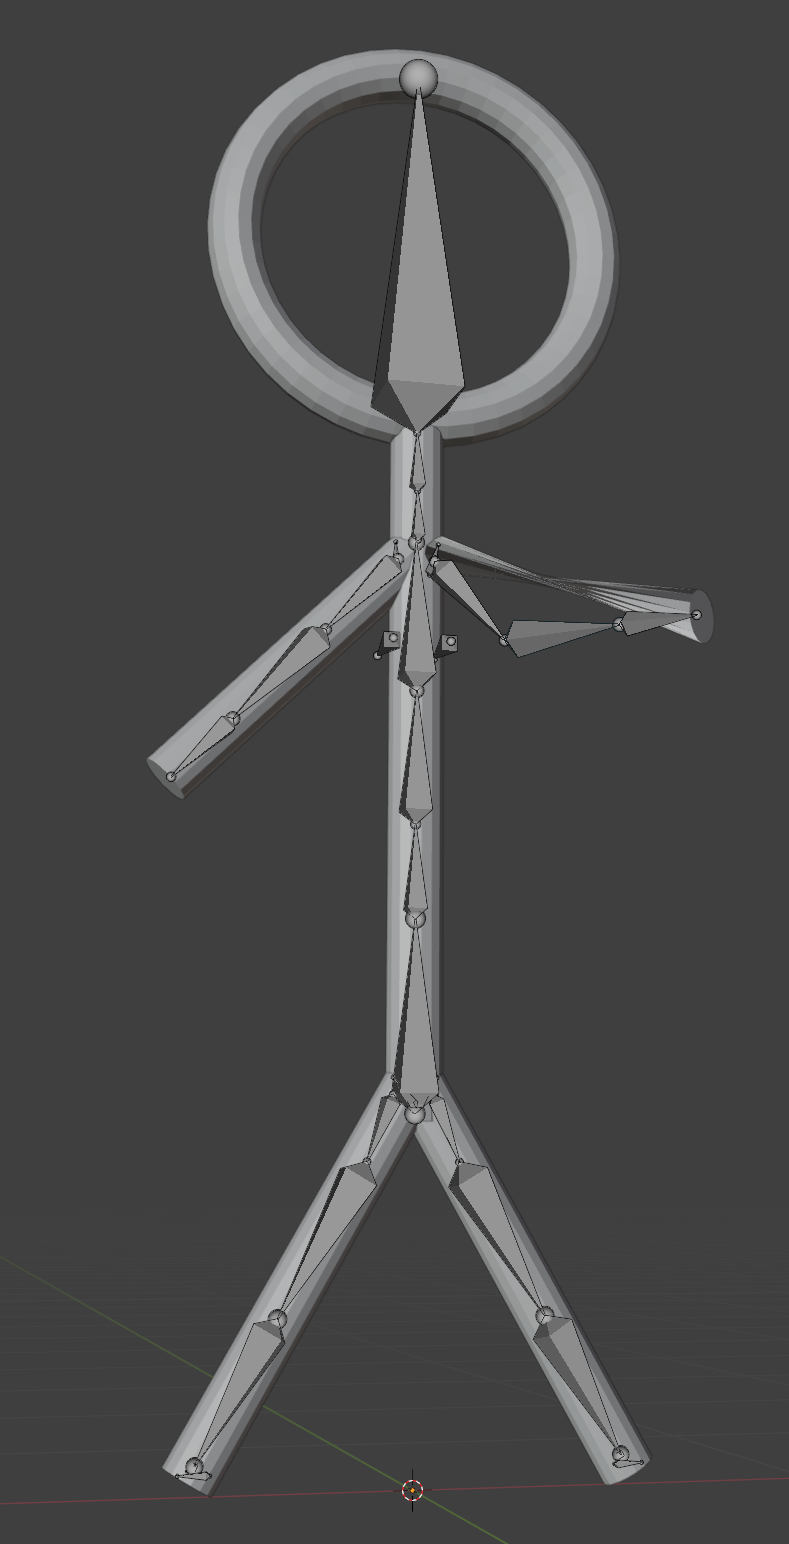
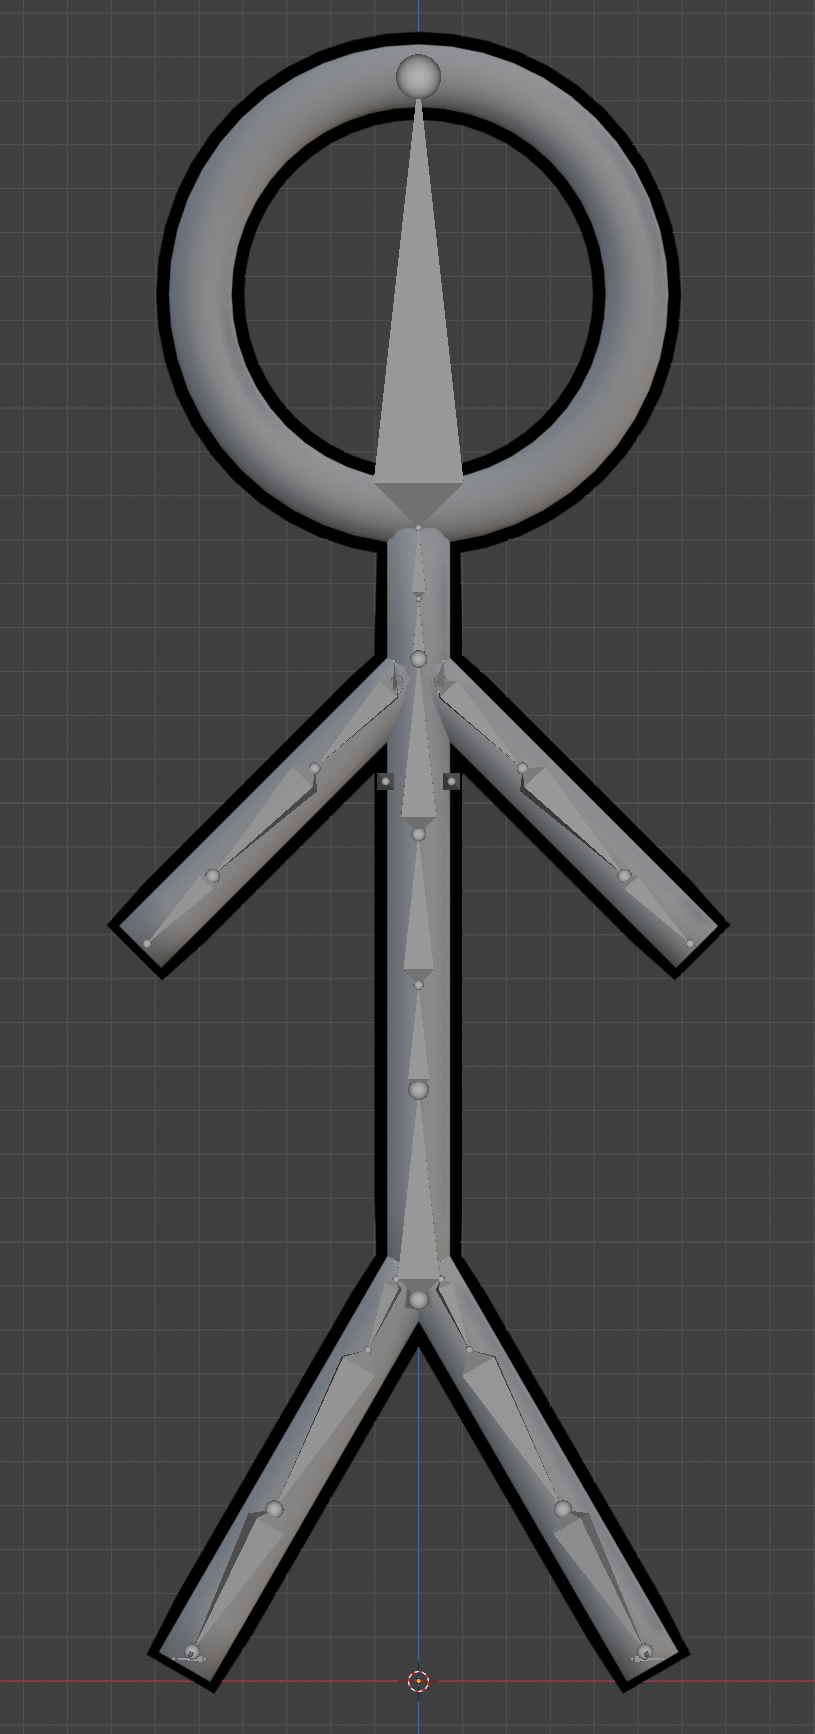
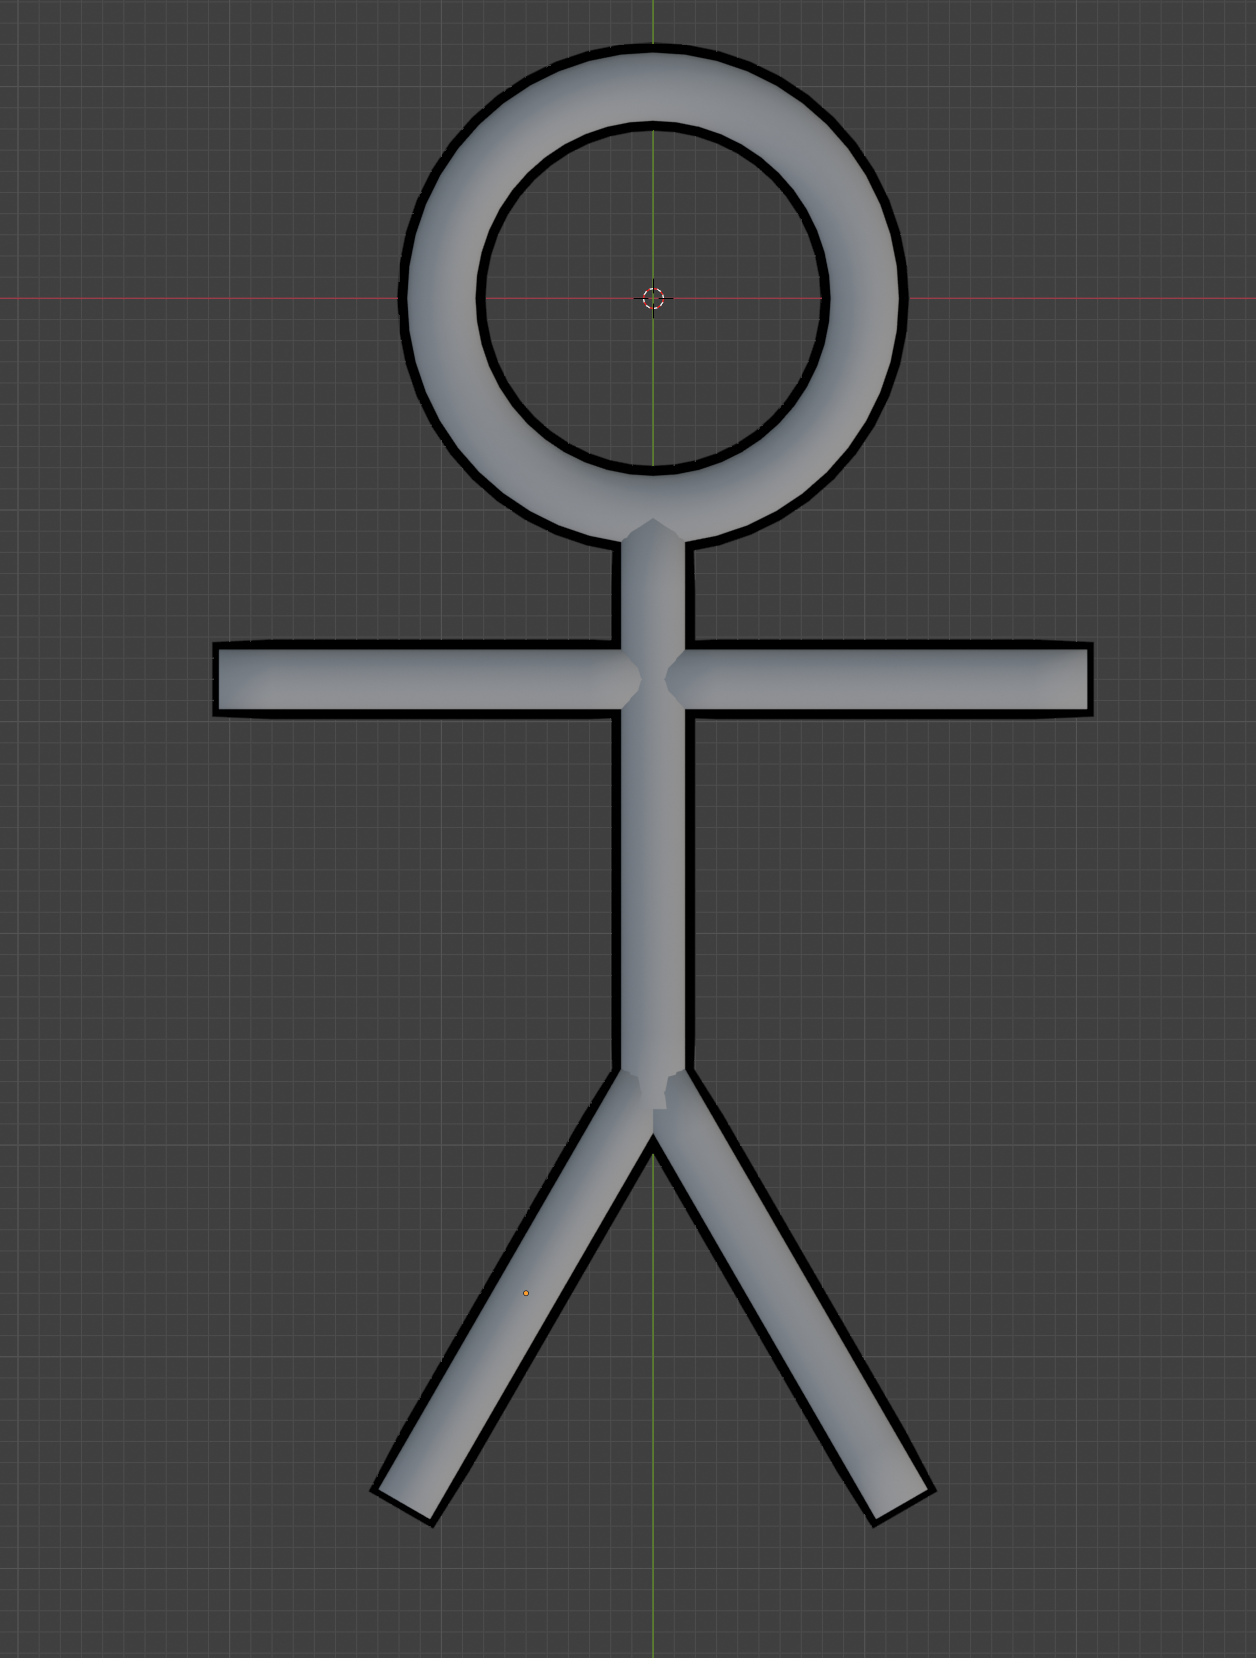
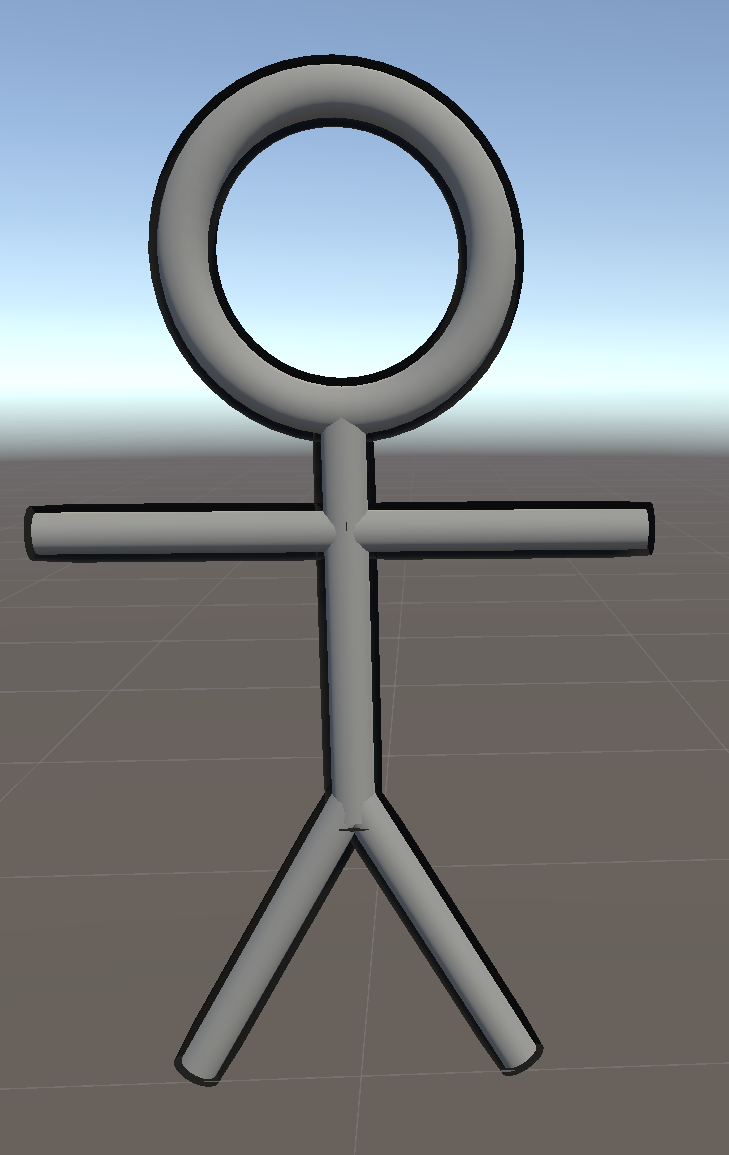
This was the first time I had tried making a non-chainmail 3d model outside of following a step-by-step tutorial. So I decided to start as simply as possible by making a stick figure avatar. I opened Blender and laid out five cylinders for the limbs and torso, and a torus for the head. After that, I followed FreedomArts3D’s tutorial on rigging models in Blender, resulting in attaching an armature to my model.
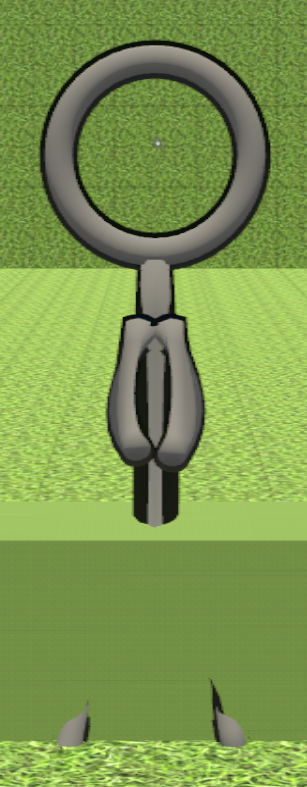
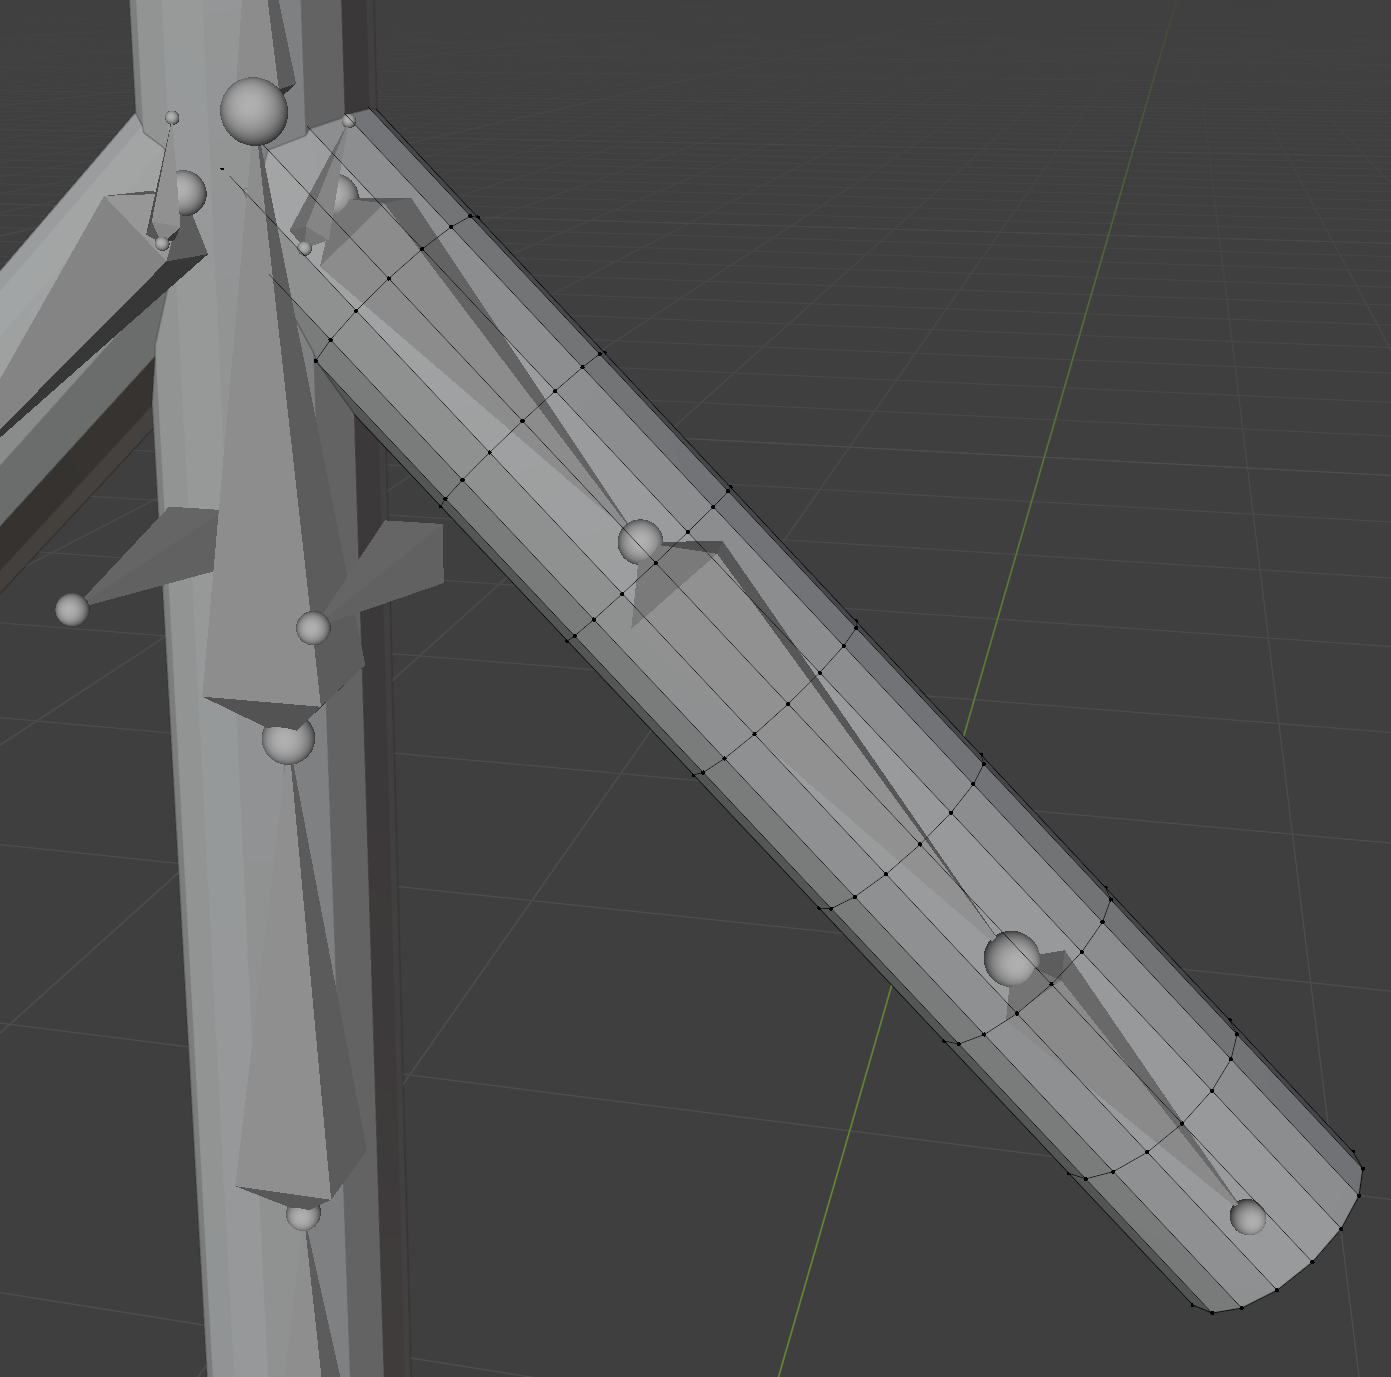
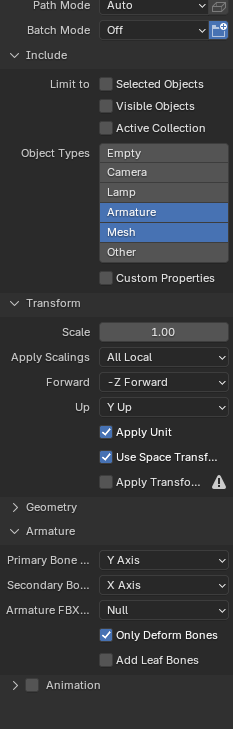
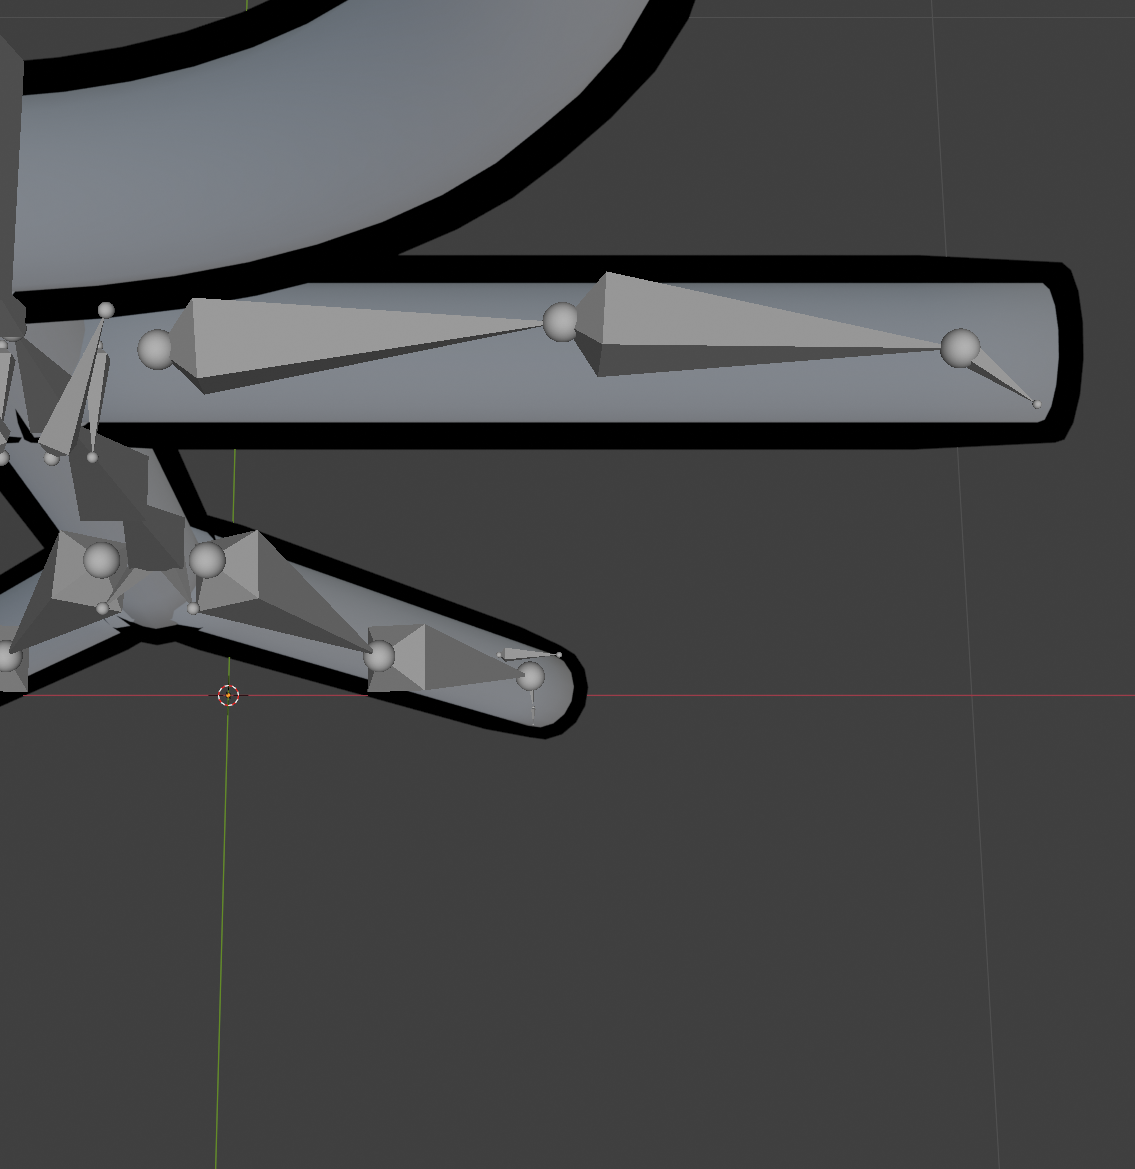
I was testing the newly rigged model in pose mode, when I noticed that the arm looked quite bad when it was bent. I did some research and determined that it was because the arm had very few vertices. I decided to add more by doing some loop cuts (photo). The arm was able to bend much more cleanly with the loop cuts in place. Assuming that would improve all other limbs and the torso, I applied loop cuts to them, applied my standard ring grey, set smooth shading and added my favourite black outline before finally exporting the model as an FBX file (settings photo) in preparation for loading the model into Unity.
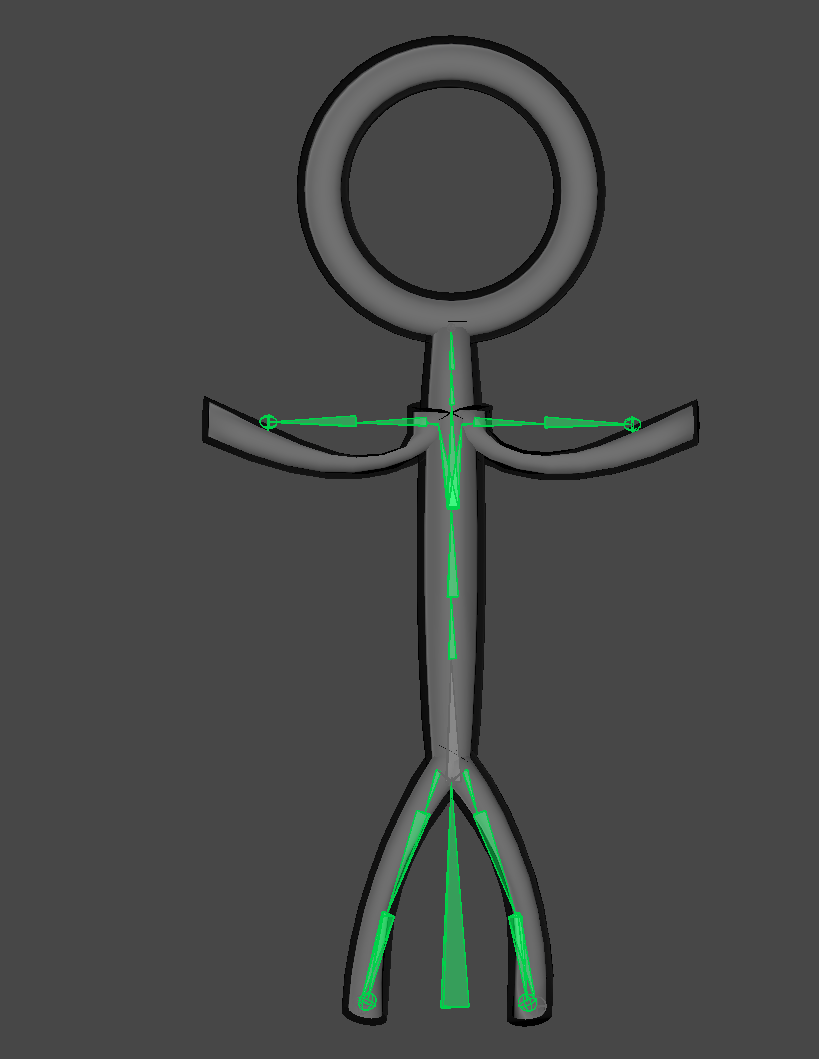
To learn the process of taking a 3d model and creating a VRChat avatar, I followed VRChat’s Creating Your First Avatar tutorial. Following the tutorial, I installed the VRChat creator companion and created a project using the default packages. Then I loaded up Unity, imported my model, added a VRC Avatar Descriptor, set the view height (red in this image) and left the lip syncing alone (green in this image) as the model has no mouth/facial features. Continuing with the tutorial, I opened the build tab to see if the avatar had issues. While I was there, I noticed that the avatar was missing an animator.
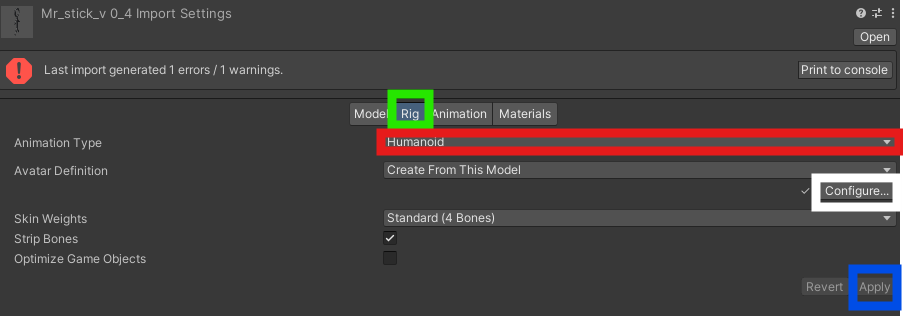
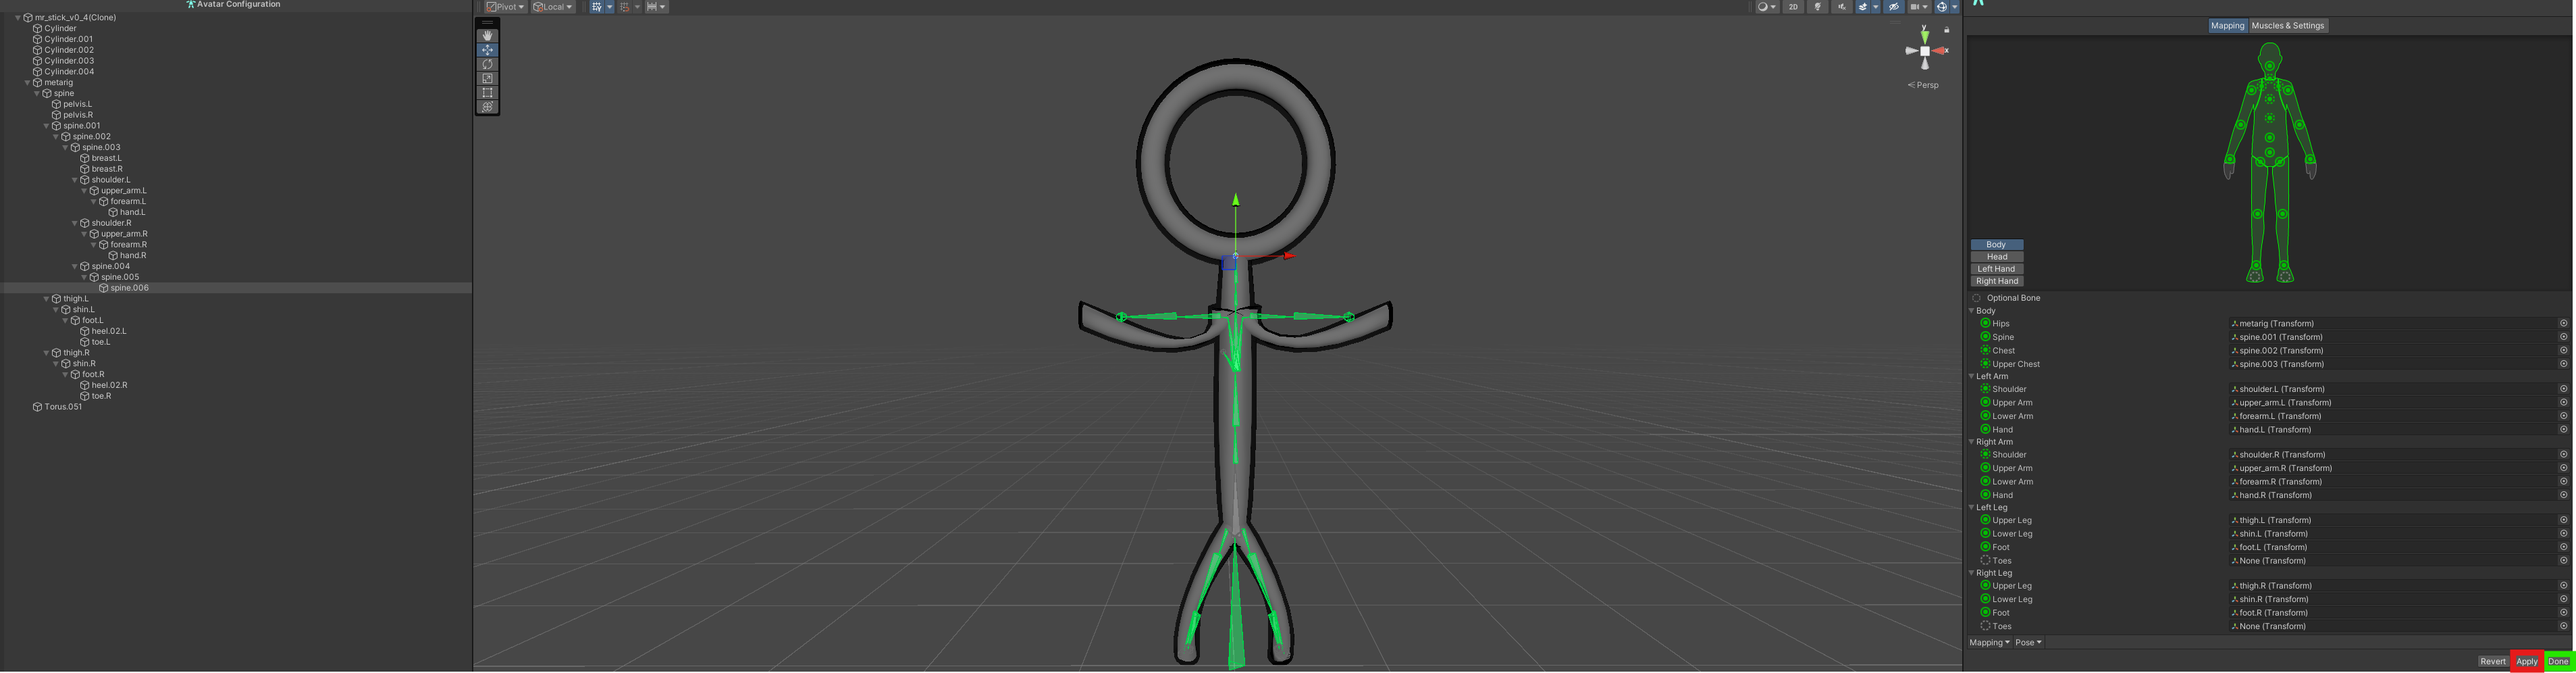
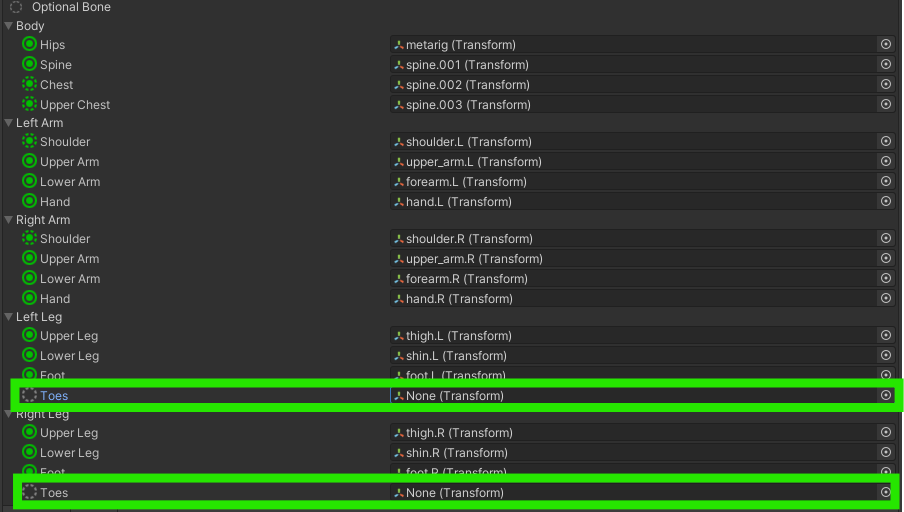
Unfortunately, adding animators was not covered in the tutorial, but after some investigation, I found a solution. The first step was to create a rig by going to the avatar asset’s rig tab (green in this image), selecting the ‘Humanoid’ animation type (red in this image), then clicking apply (blue in this image). Followed by clicking ‘configure’ (white in this image) to open up the bone map interface to map the Blender bones to the ones VRChat expects. It was a fairly simple process where all I had to do was unmap the toe bones and unmap the right eye. To cement the mapping, all I had to do was hit apply (red in this image), then done (green in this image).
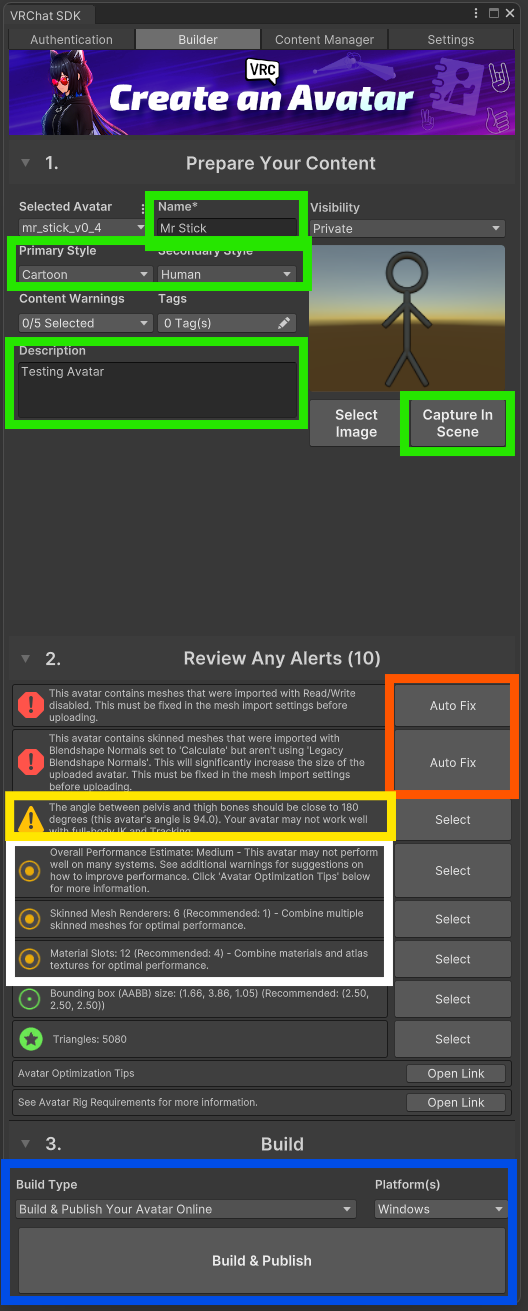
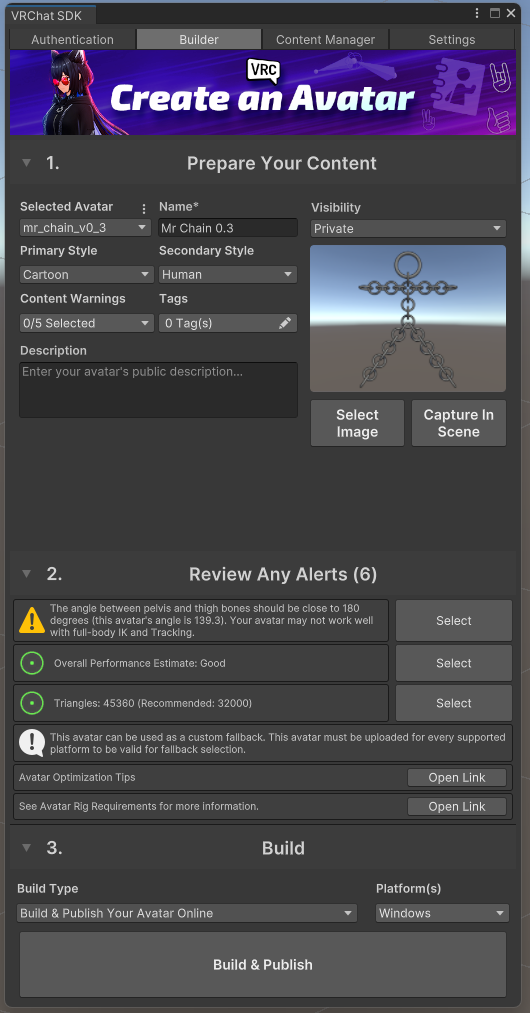
With my new animator, I reopened the build tab for the final prep. First, I set a name, styles, image, and description (green in this image). Then I clicked Auto Fix for all issues where it was available (orange in this image). I ignored the degraded ik/full-body tracking issues (yellow in this image) and planned to address the issues related to using multiple objects (white in this image) in the next version. Finally, I pressed ‘Build & Publish’ (blue in this image), booted up VRChat, selected my new avatar and stood in front of a mirror.
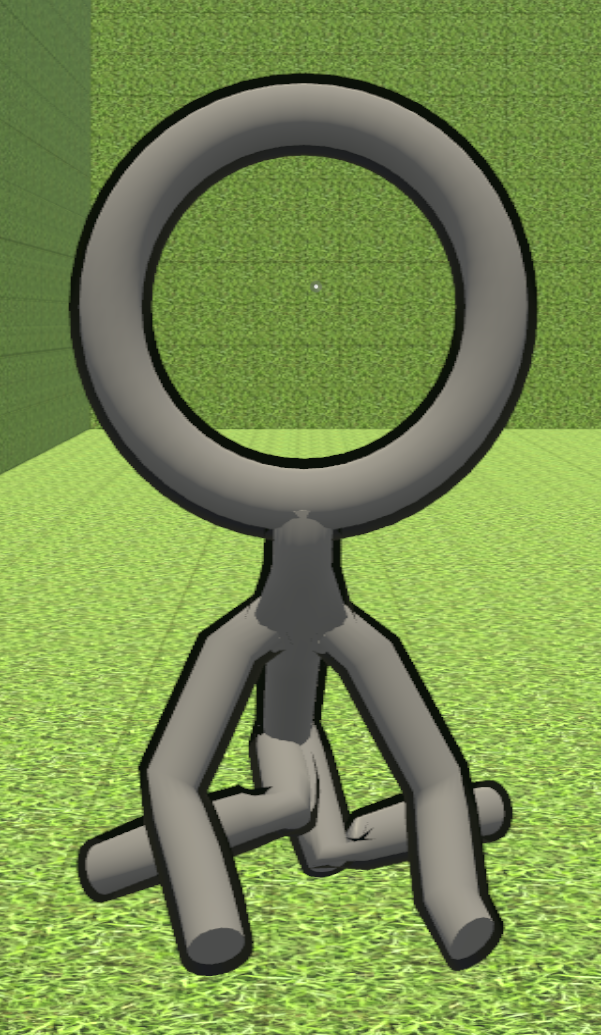
When I stood in front of the mirror and selected my custom avatar, I was happy and proud that I had finally accomplished this task I had wanted to do for a long time. Then I noticed the shoulders being brought forward and separate from the torso, the knees bending backwards, and the torso flapping when I moved. This convinced me that I needed to try again with a new model and address these issues.
Improving My First Avatar
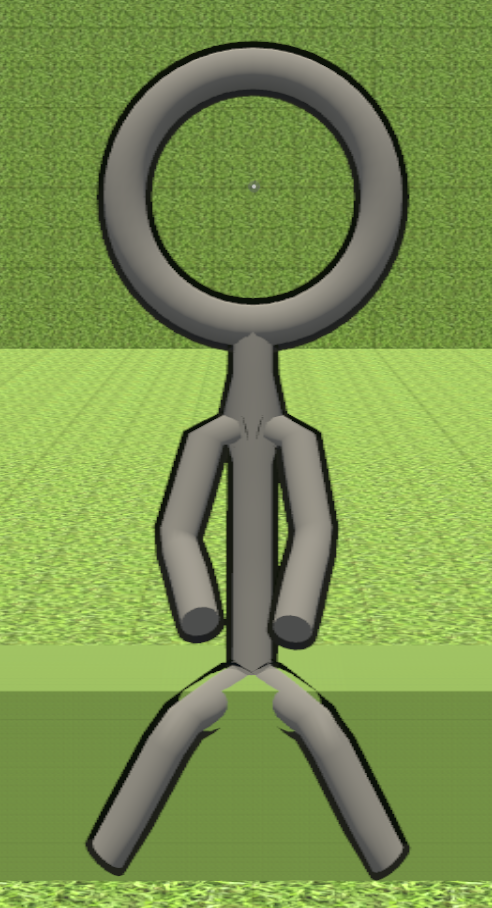
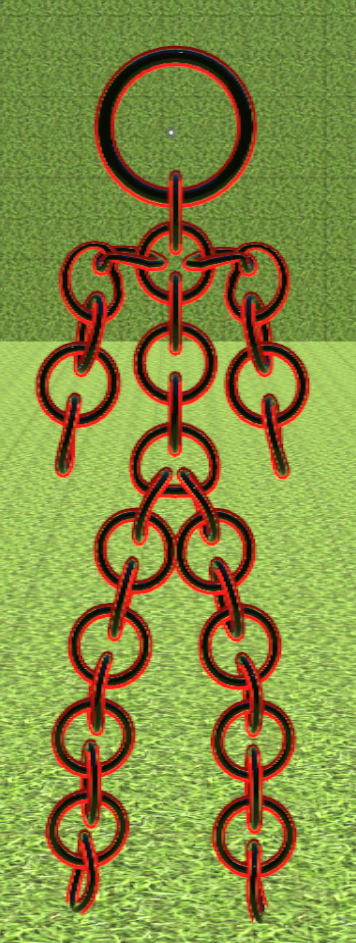
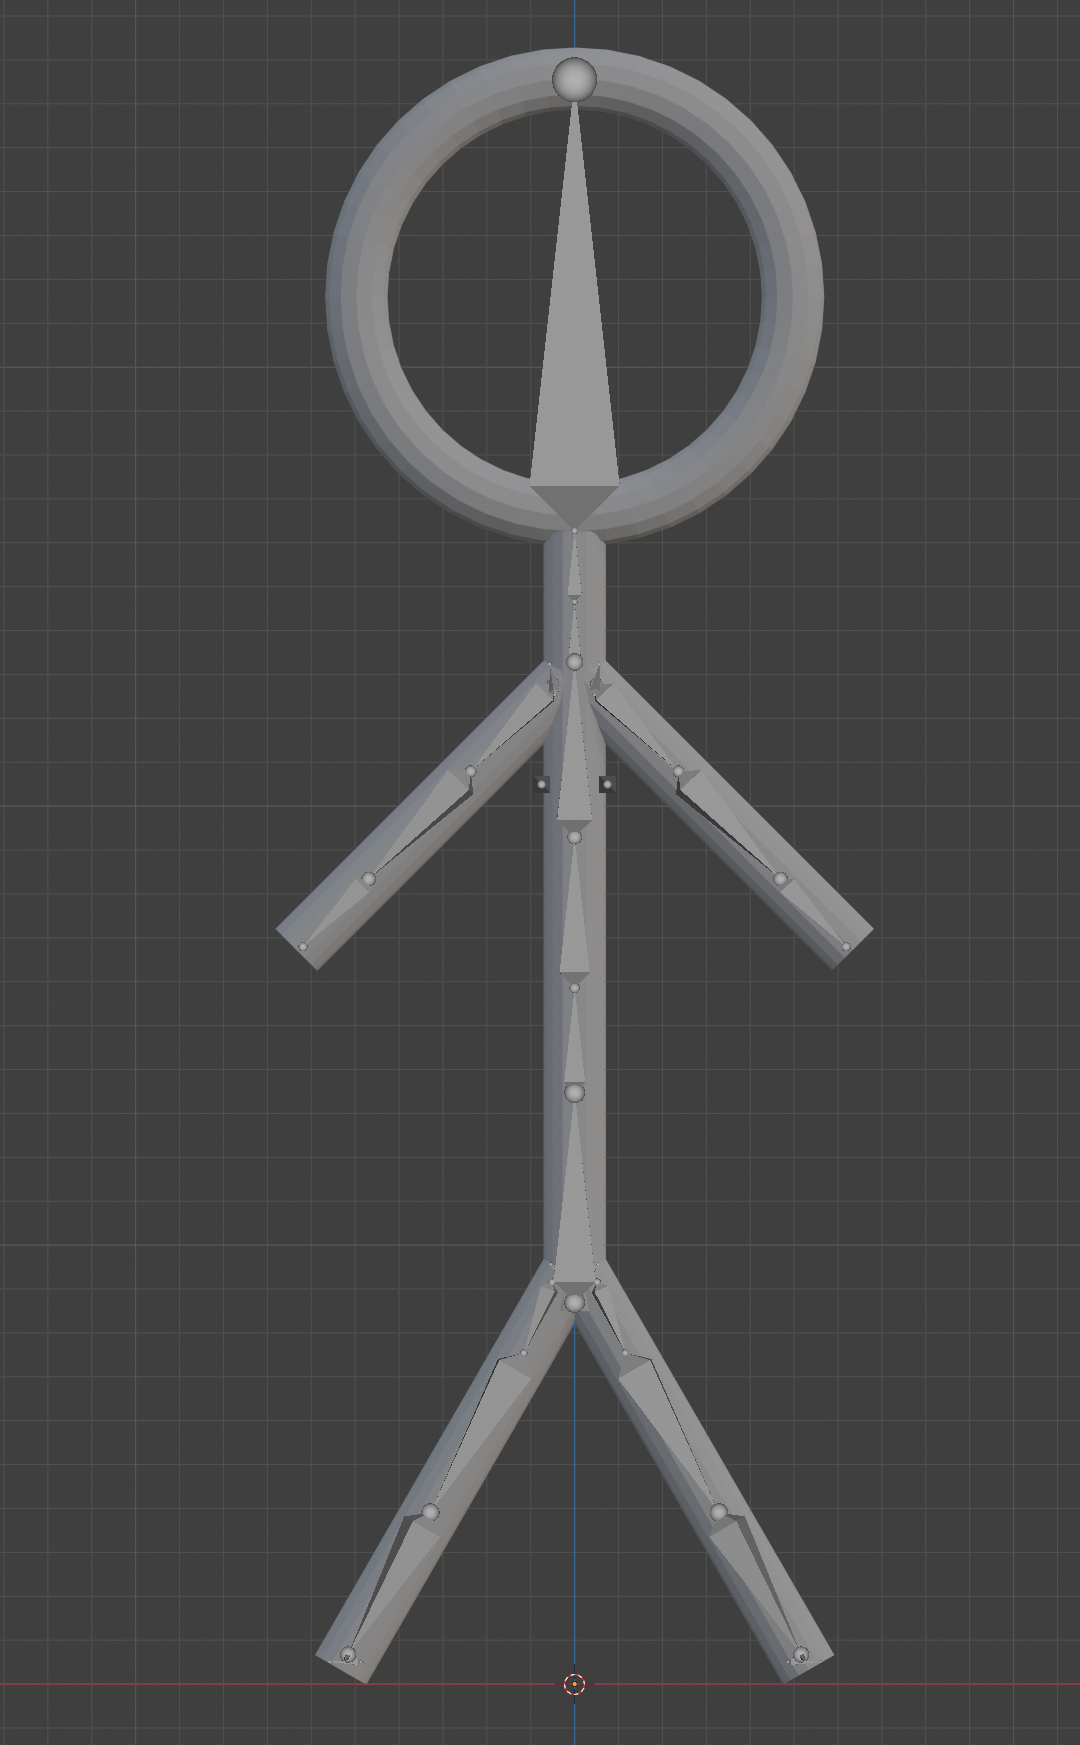
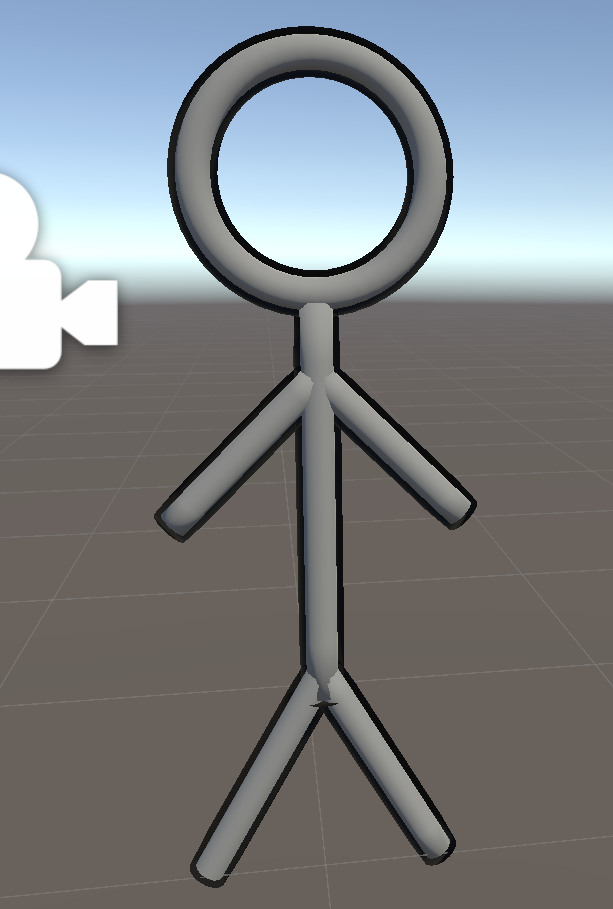
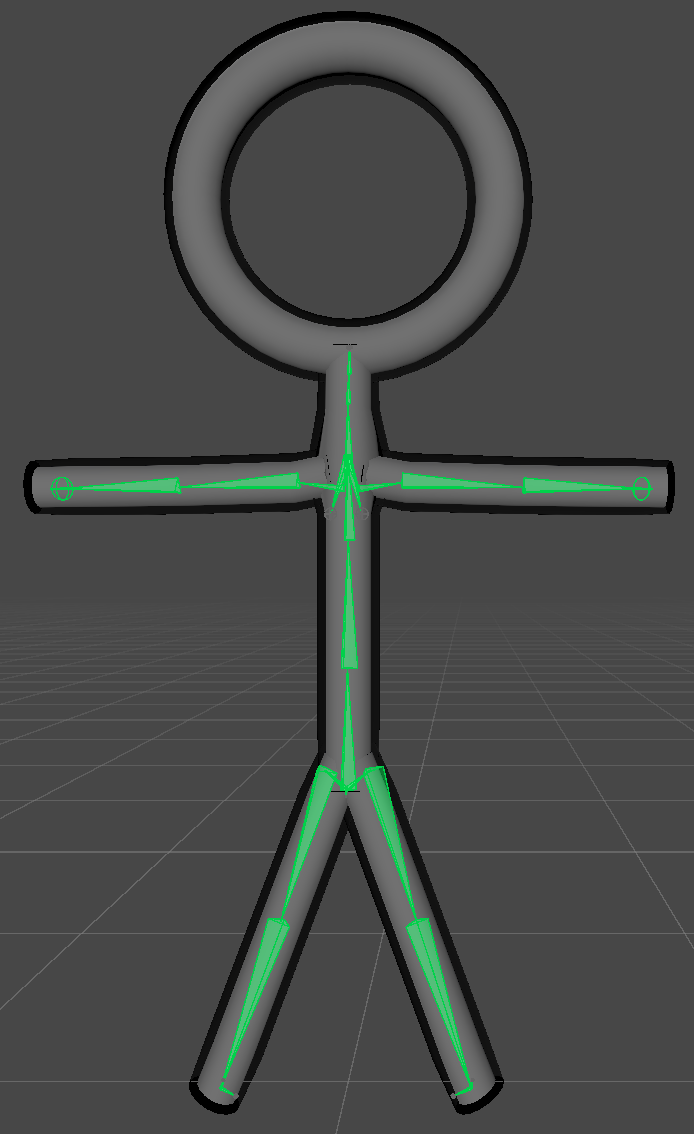
After finishing my first custom avatar and recognizing its flaws, I wanted to try remaking it before moving on. This time, I started with a similar base model; however, I chose a T-Pose instead of an A-Pose since that is the default pose Unity expects, and I hoped it would avoid the weird arm stretch the last model had. Additionally, I merged all the meshes into one to de-duplicate materials in the model and use a single mesh to address issues from the build menu of the last model. To view an interactive version of the model at this stage, go here.
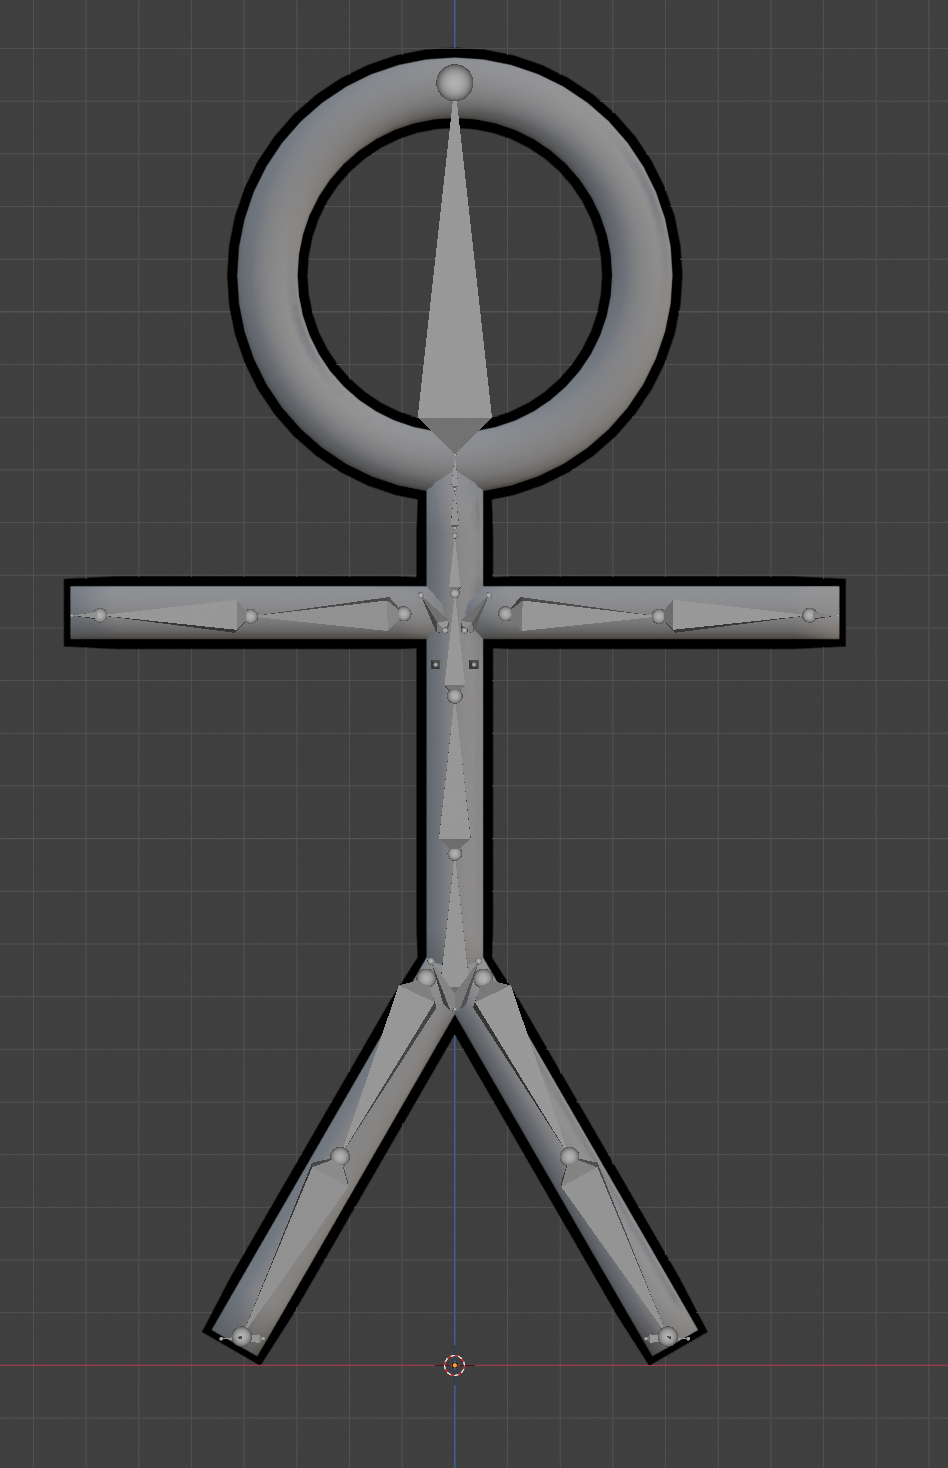
With the base model in place, I only needed to add the rigging following the same tutorial as last time, with one small adjustment this time. Instead of having the arm and leg joints perfectly straight, I moved the middle arm joint slightly to the back and the middle leg joint slightly forward so that Unity can determine the proper bend angle.
After touching up the armature, I used the same export, project creation, model import, and model rig creation settings. With the improved armature, the model bones in Unity looked much better this time. Additionally, when I checked the VRC Build Menu, I had fewer problems since I had a single mesh and two distinct materials this time. In fact, I actually got a performance rating of ‘Good’.
After the build, I opened VRChat, selected my new avatar, and looked at it in a mirror. The shoulders were a bit awkward, there was some outline clipping where the limbs intersected the torso, and the crouch looked weird in the knees. I was still happy as this model was much better than the last one. The majority of the issues were minor and would not affect the next version due to differences in construction, so I saw fit to move on to the next stage.
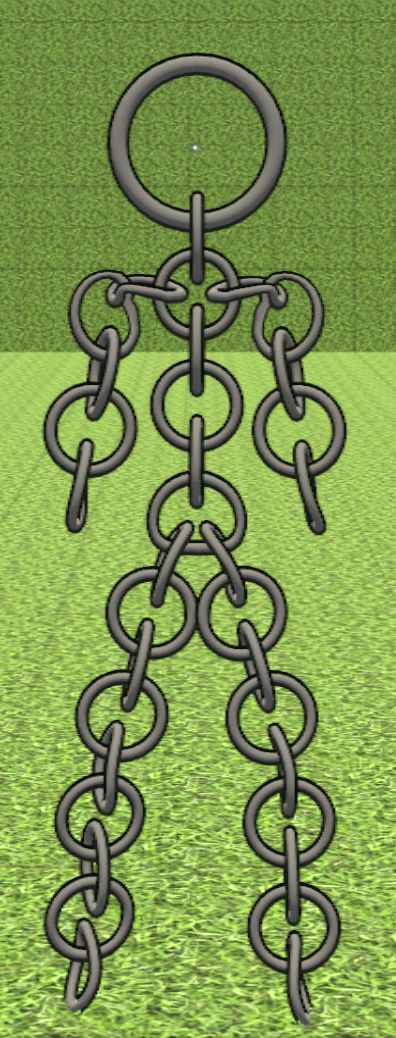
Making Mr Chain
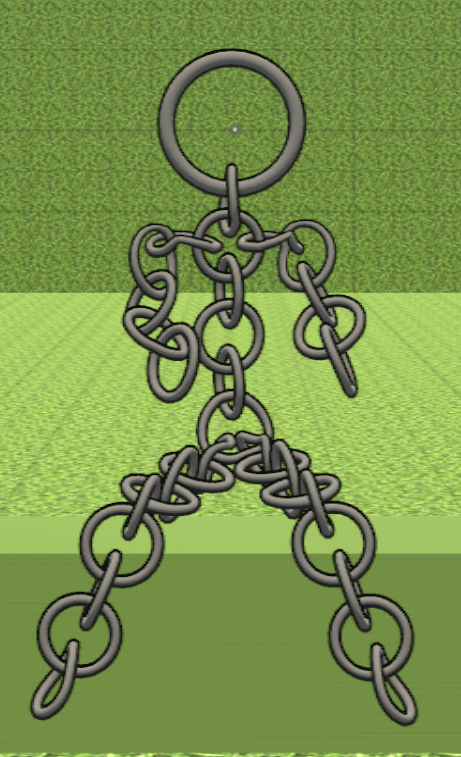
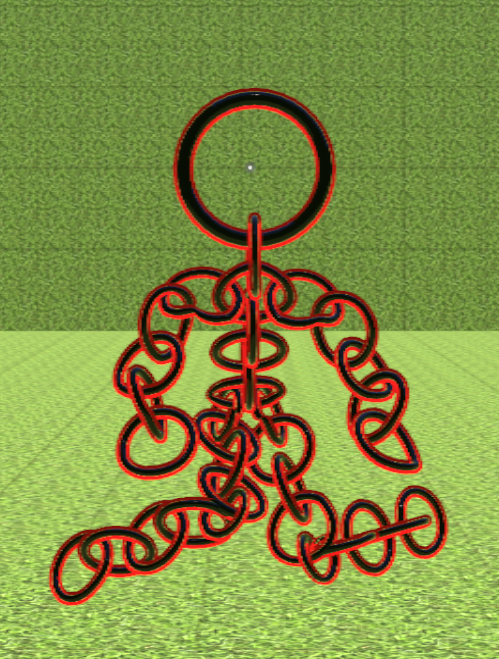
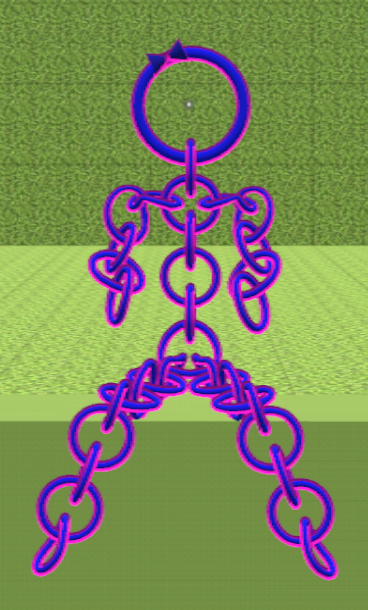
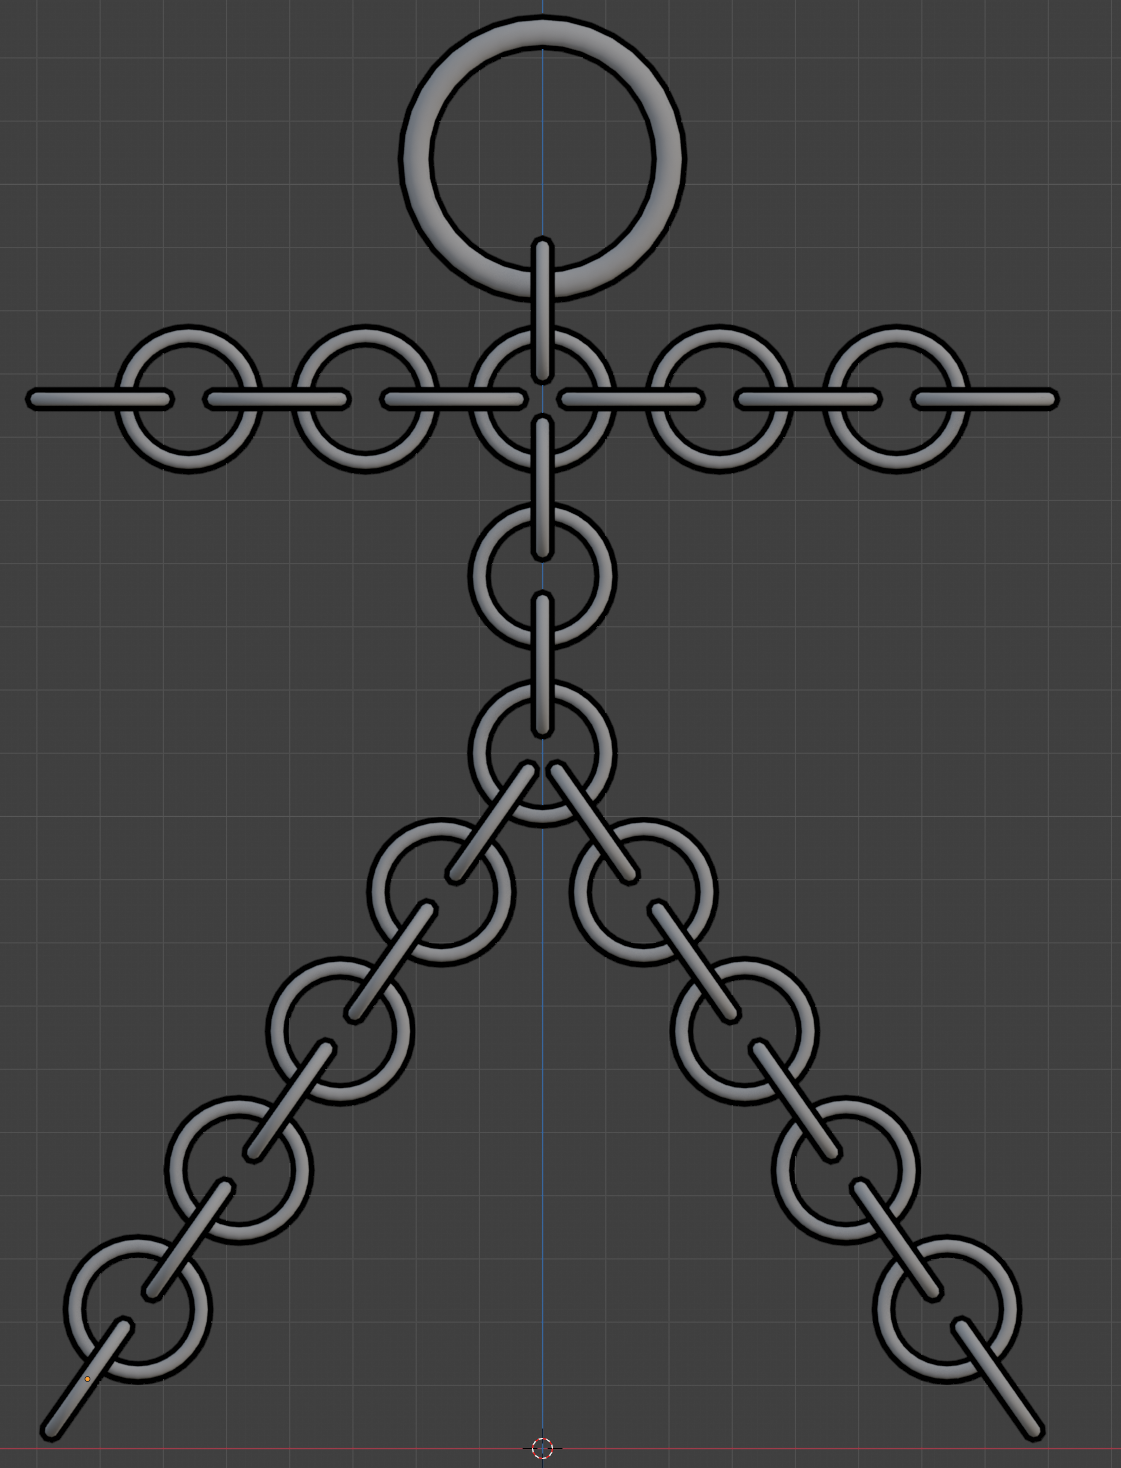
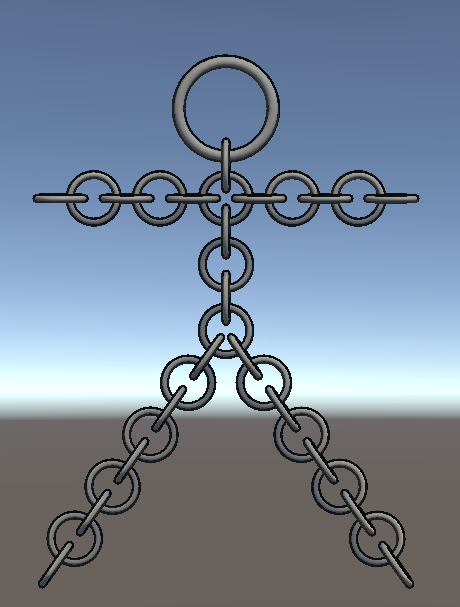
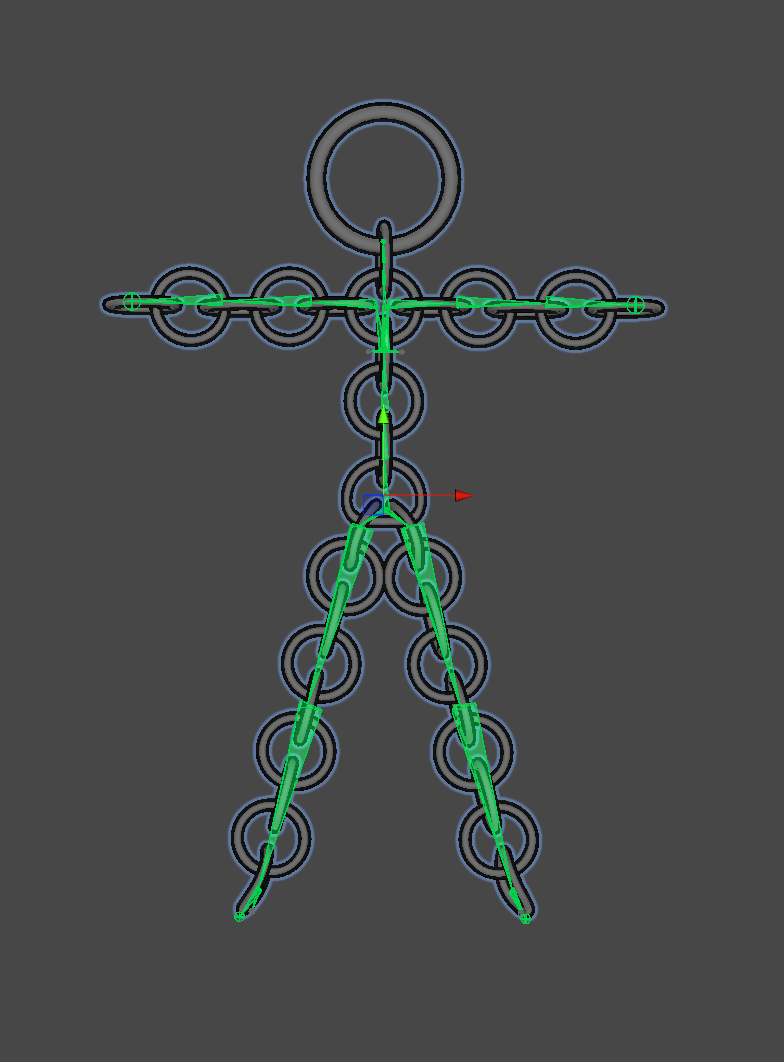
Now that I had an avatar that met my standards, it was time to move to the main event, a VRChat avatar out of chainmail. I started with a base model made from 2-in-1 Chain (photo, interactive model). I added an armature following the steps I learned making Mr Stick V2, imported the model into Unity, mapped the bones to Unity, and published using the VRC Build Menu with an overall performance rating of ‘Good’.
After the build, I opened VRChat, selected my new avatar, and looked at it in a mirror. The rings for the shoulders, hands, feet, and pelvis did bend; however, I felt elated at seeing my vision come to life. If you want to use it as your avatar, you can find it here.
Making Custom Variants
After making Mr Chain, I knew I wanted to make the model public. I still wanted a custom version for myself, so I made Mr Chain M Special. To do this, I modified the materials I used to make Mr Chain so that I would have a special avatar just for me that fit my favourite colour scheme.
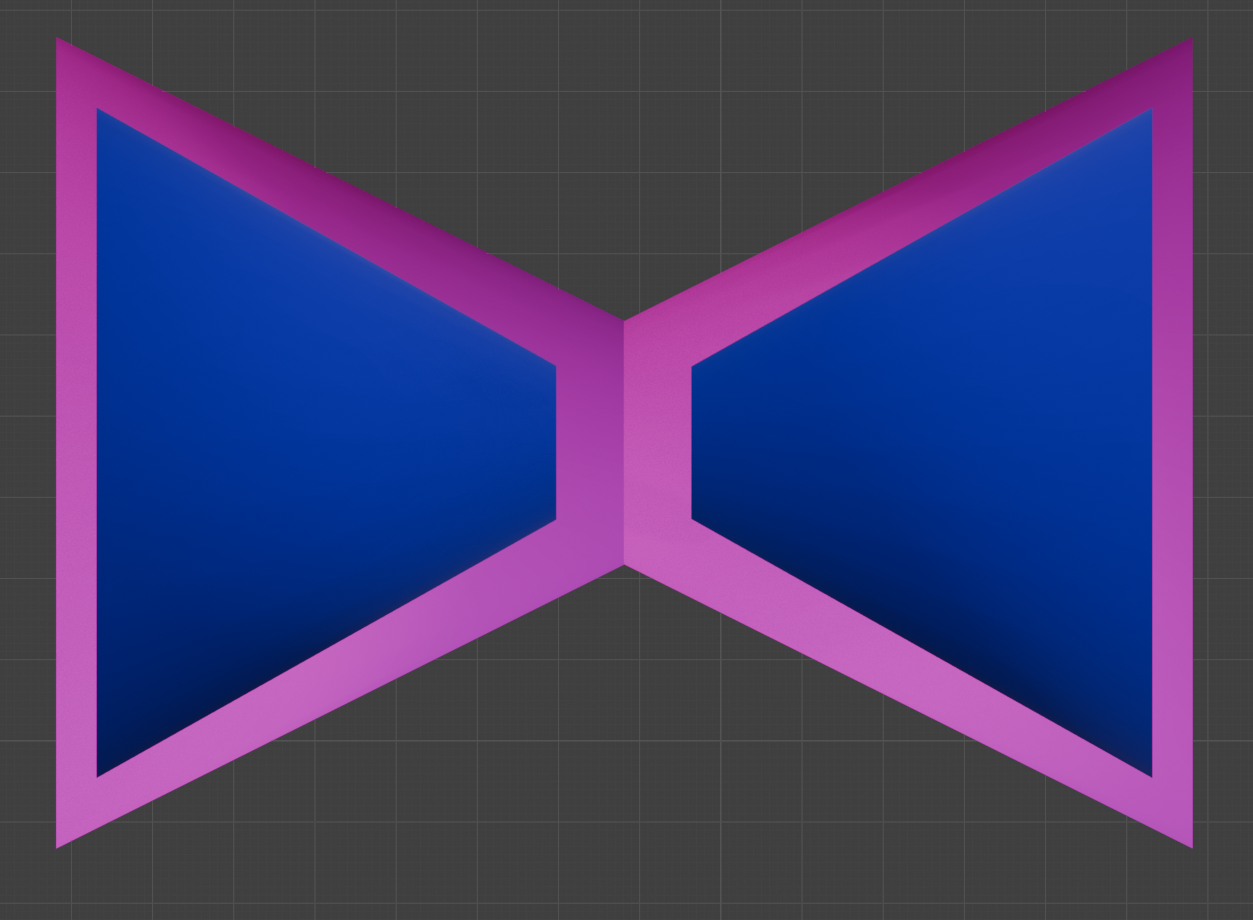
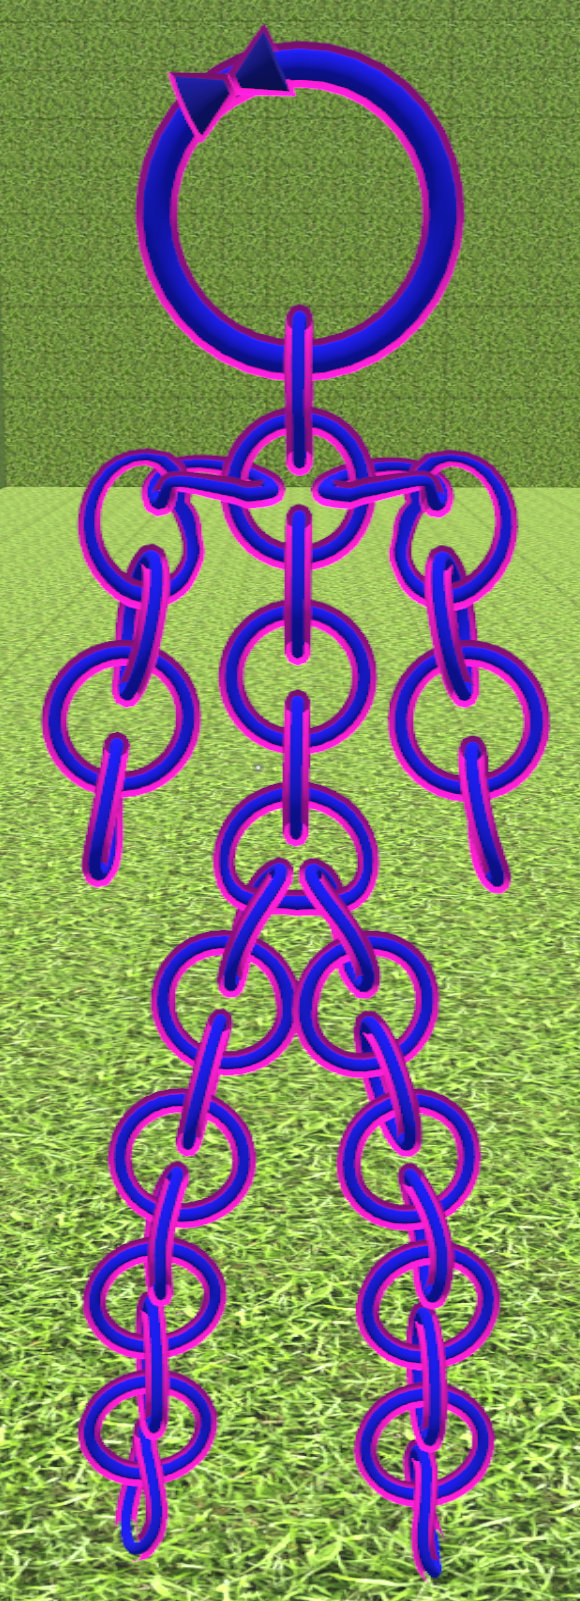
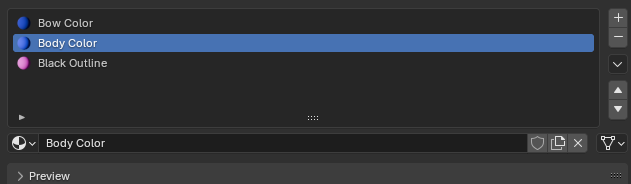
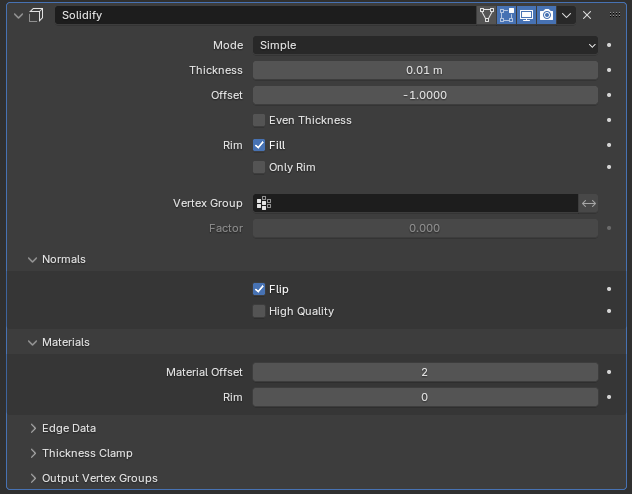
A friend whom I typically play VRChat saw my unique variant and asked for one of their own, so I made her Mrs Chain T Special. This one called for three different materials, which meant I had to tweak my usual solidify modifier. The last change I incorporated was making a bow by sticking two cones together, and moving that to the head ring of the model.
Future Improvement Notes
Given the time constraints I worked under, I am happy with the amount I learned, and I think the avatars I made are a great initial step into the world of 3D modelling and rigging. I can see three primary ways to improve upon the current Mr Chain: make each ring solid and non-deforming, replace the 2-in-1 chain with a more complex weave, and add more details for more complex rigging.
I used Rigify’s automatic weights for each avatar I made this month. These automatic weights were very easy to set up and performed wonderfully, although some rings had their vertices influenced by more than one bone. A ring whose vertices belong to more than one bone can be deformed when the model moves. To avoid this, each ring must have its vertices influenced by only one bone. Doing this requires manually assigning the rings to the bones. Unfortunately, I did not have time to experiment with that this month.
Right now, Mr. Chain uses a very simple 2-in-1 Chain weave. I would like to use a more complex and visually appealing weave. However, the model is already more than halfway to VRChat’s soft cap on the number of triangles in a mesh. I can see two options to use a more complex weave while staying under the triangle limit: reduce the number of triangles per ring, or investigate texture painting and paint a weave texture on a simpler object.
Another interesting expansion that could be fun to try is setting up more complex rigging. I could try adding rings for eyes, a mouth or even fingers. Adding and rigging these additional features would require a more complex rig but would result in a more fleshed-out and expressive avatar that would map to the user’s body more closely.
Additionally, these three improvements are not mutually exclusive and could be combined to create an even better model. However, a rigged model VRChat avatar is not the only use case; it could be a VTuber avatar, a game character, or a character in an animation. If I expand the scope of use cases for these skills beyond avatars, I could make VRChat worlds, video game assets, or interactive educational experiences. There is an amazing variety of uses for these skills. I found this project highly rewarding, and I get excited thinking about what else I could use these skills for. If I ever run out of ideas, or experience another shipping delay, I may come back to this and try some of these extension ideas.
Pictures
Mr Stick Version 1
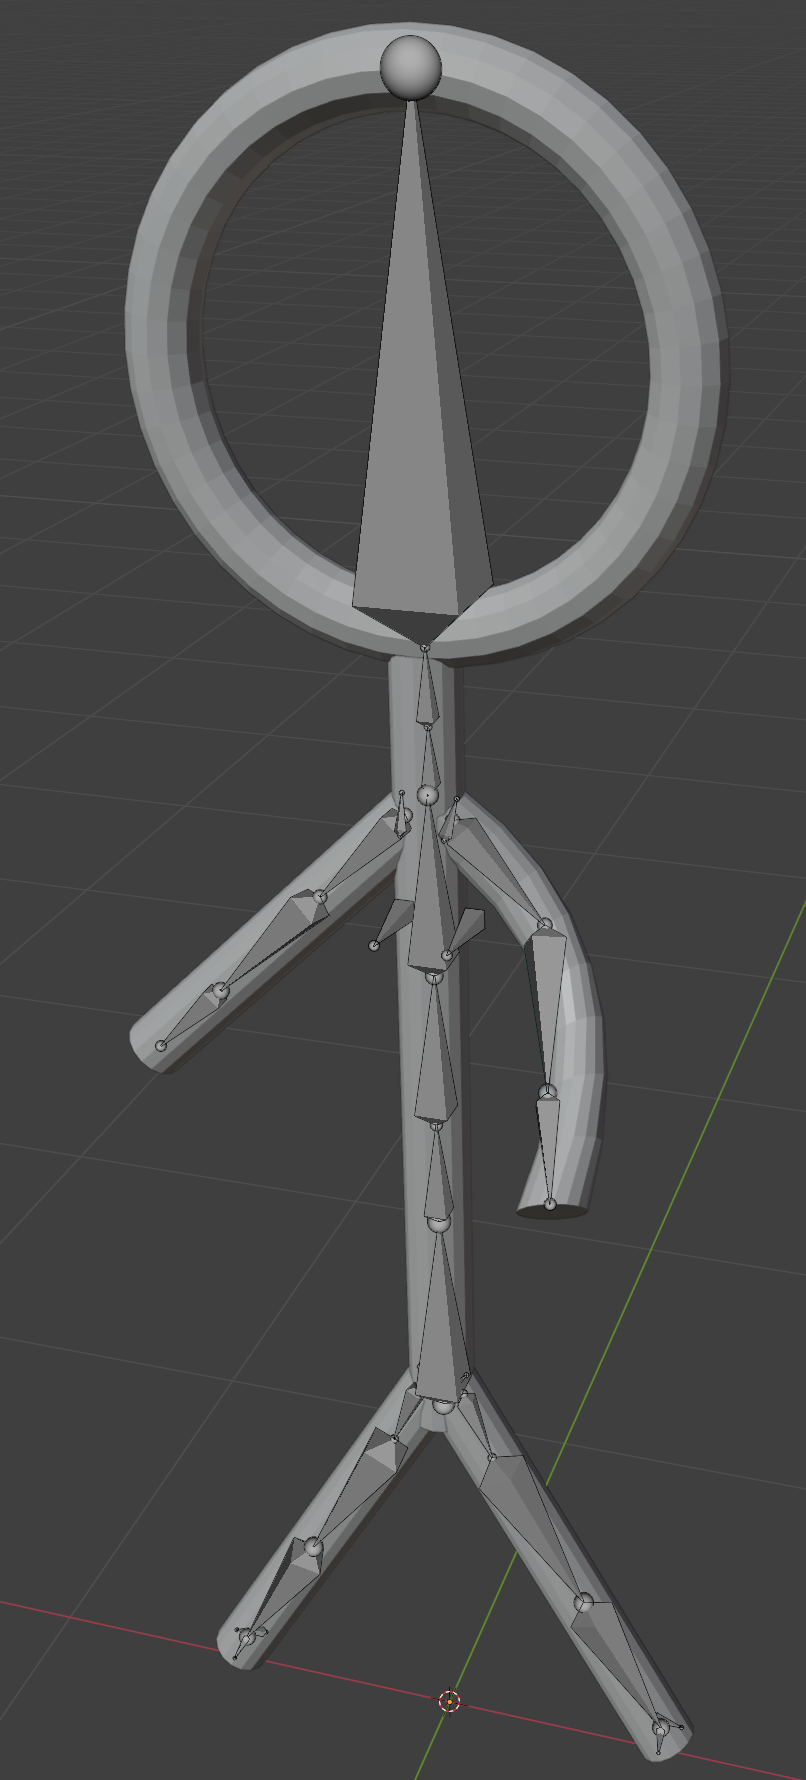
Mr Stick Version 2
Mr Chain
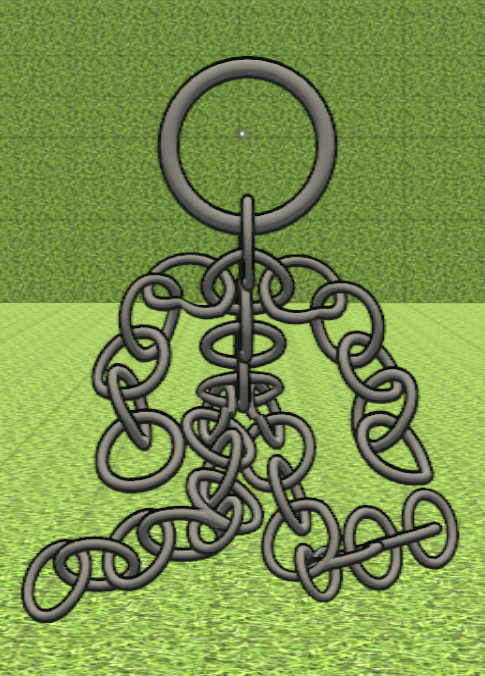
Mr Chain M Special

Mrs Chain T Special

Mr Stick V1 Starting Body
Mr Stick V1 With Armature
Mr Stick V1 Bad Arm Bend
Mr Stick V1 Arm Loop Cuts
Mr Stick V1 Good Arm Bend
Mr Stick V1 Standard Grey
Mr Stick V1 Smoothed and Outline
Mr Stick V1 In Unity
Mr Stick V1 Bone Map
FBX Export Settings
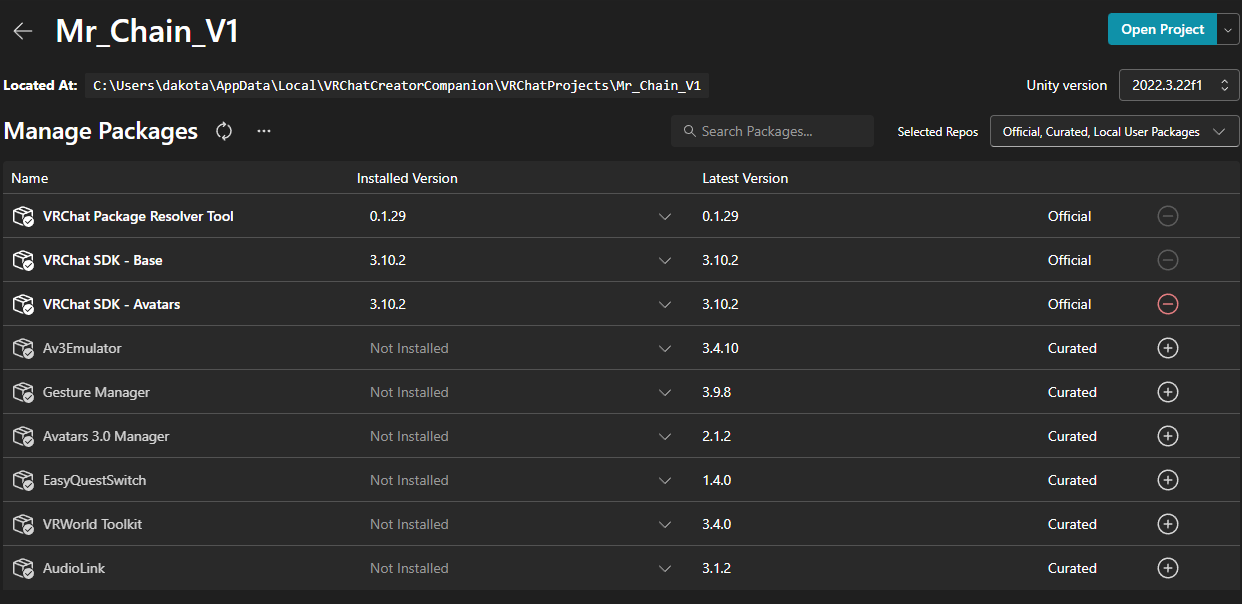
VRChat Creator Companion Project

VRChat Creator Default Packages
Unity VRC Avatar Descriptor
![]()
Unity Missing Animator

Unity Create Animator
Unity Bone Map Interface
Unity Unmap Toes
Unity Unmap Right Eye

Unity Final Prep And Publish
Mr Stick V2 Base Model
Mr Stick V2 Model With Armature
Mr Stick V2 Slight Limb Armature Adjustments
Mr Stick V2 Model In Unity
Mr Stick V2 Model With Unity Bones
Mr Stick V2 VRC Build Menu

Mr Chain Base Model
Mr Chain Model With Armature

Mr Chain In Unity
Mr Chain Unity Bone Mapping
Mr Chain VRC Build Menu
Mrs Chain T Special 3 Materials
Mrs Chain T Special Tweaked Solidfy Modifier
Mrs Chain T Special Cute Bow