Metroid Inlay
Overview
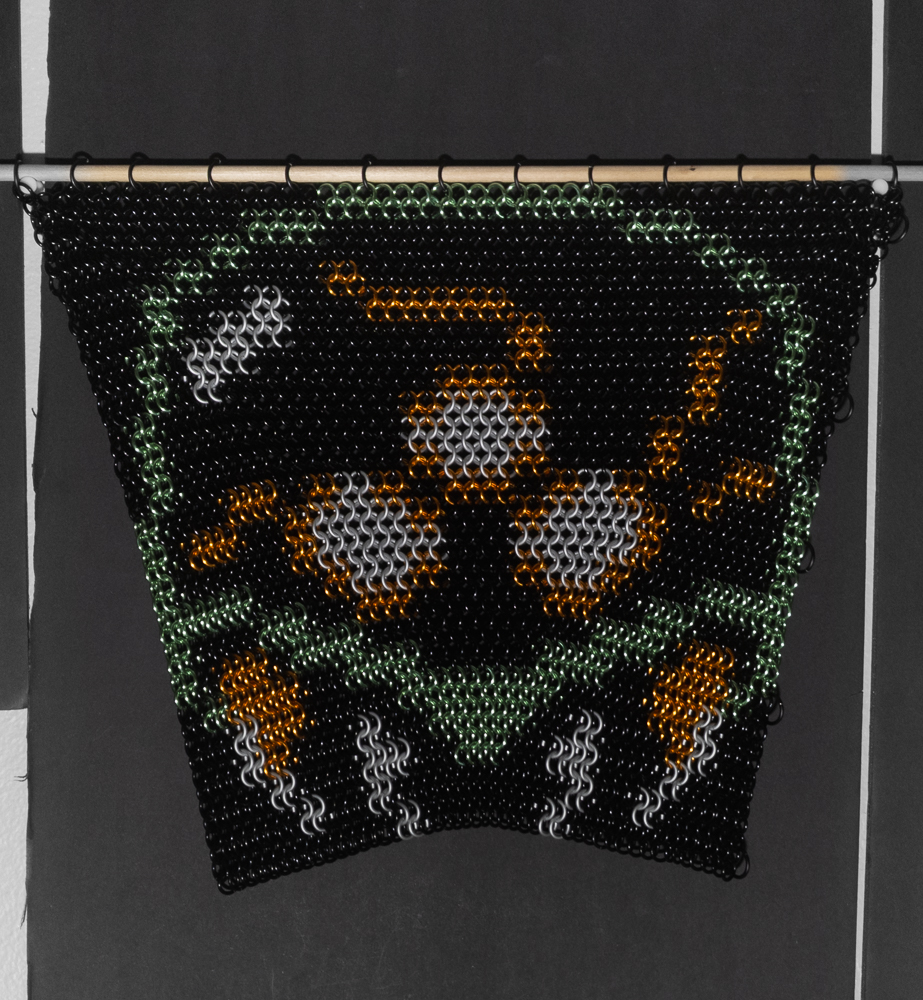
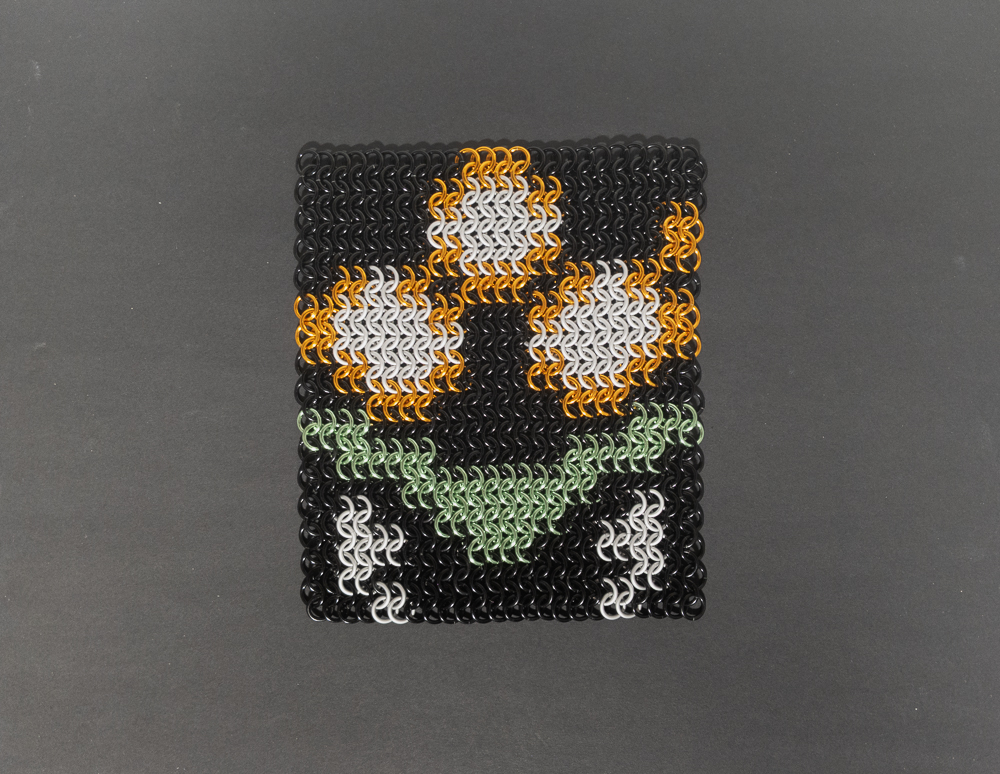
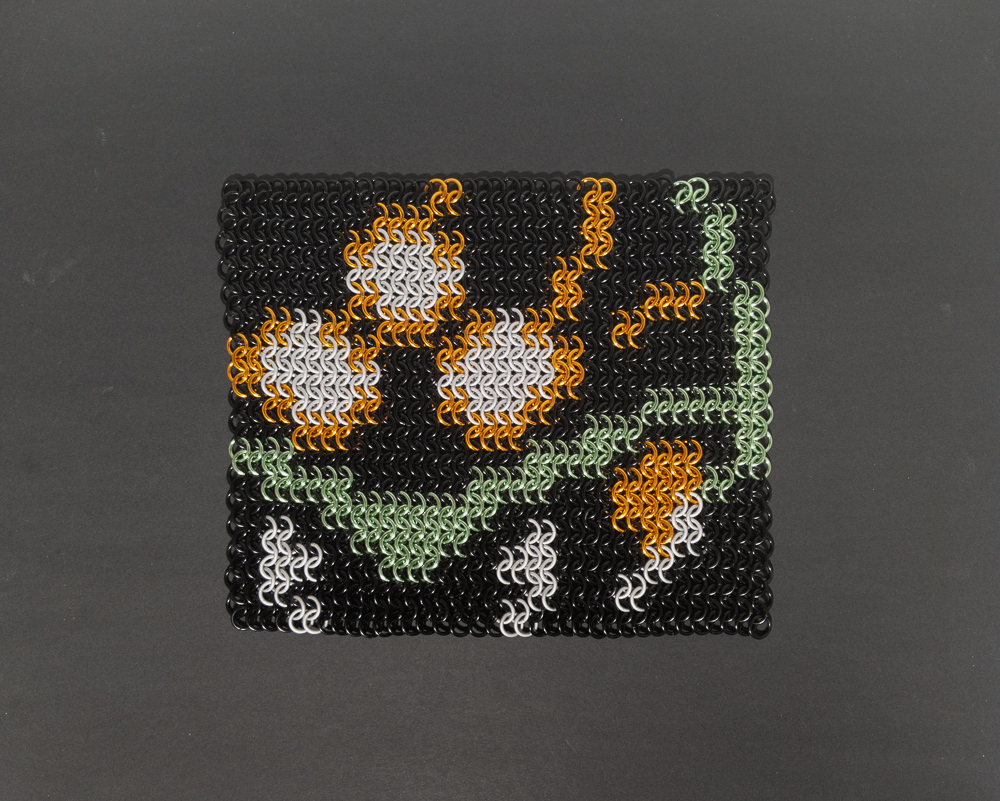
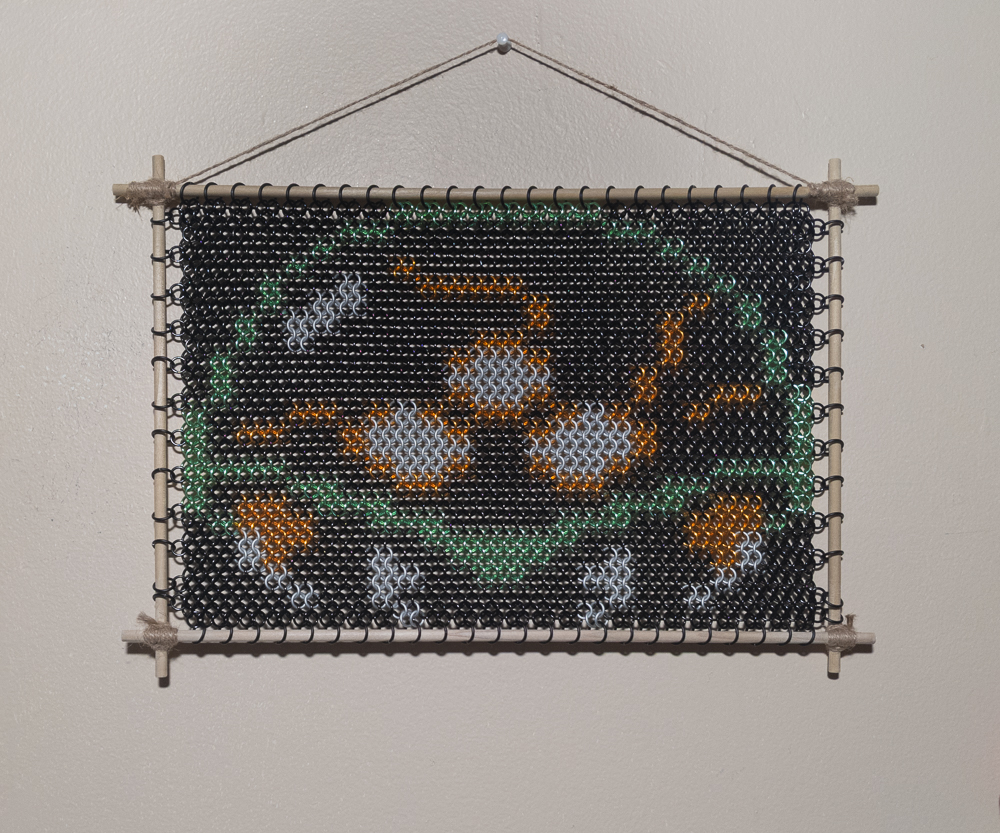
Since I wrote my last post, I have been thinking about inlays and wanted to apply the lessons I learned, along with the additional time afforded by the monthly cycle, to a larger, more challenging inlay. I had previously been thinking about how I could make a Metroid shape with another weave, so my thoughts turned toward making a Metroid inlay. With my goal set, I designed a 48x48 ring inlay totalling 2300 rings (over 3 times larger than Phoenix). When I look at my rendition of this space parasite in European 4-in-1, I see some rough edges (that will be fixed), but I feel inspired to try more new things.
Materials
I bought all the rings used in this project from The Ring Lord. Here are the rings used in this project:
| Item | Option Details |
|---|---|
| Bright Gold | 16 SWG, 1/4” ID Bright Aluminum rings in gold |
| Bright Lime | 16 SWG, 1/4” ID Bright Aluminum rings in lime |
| Matte Frost | 16 SWG, 1/4” ID Matte Aluminum rings in frost |
| Matte Black Rings | 16 SWG, 3/8” ID Matte Aluminum rings in black |
| Bright Black Rings | 16 SWG, 1/4” ID Bright Aluminum rings in black |
Additionally, to make the frame, I bought supplies from various retailers. The supplies I bought and where I bought them are:
| Item | Store | Details |
|---|---|---|
| 1/4” Dowels | Home Depot | These formed the core of the frame and provided the stiff structure to attach rings to. |
| Jute Twine | Home Depot | Used to join the dowels together to form a proper frame. |
| 100 Grit Sandpaper | N/A | My Dad’s old sandpaper used to roughen up the dowel to improve the hold of the twine. |
| Contact Cement | Dollarama | Used on the jute bindings to improve adherence to the dowel and prevent fraying. |
| Hot Glue | N/A | Hot glue I borrowed from a friend to attach the backing to the frame. |
| Black Foam Board | Dollar Tree | Used as the backing of the frame to improve appearance (compare with and without). |
Notes
Choosing the Subject
Since I wanted to make a Metroid without spending a fortune, I would need to stay in the realm of pixel art, which left me with two main options, Metroid and Super Metroid (at the time I forgot Metroid: Zero Mission). Unfortunately, for the more detailed Super Metroid Sprite, whose ring count, when doubled, 5,7600, shot far past my budget, removing it from consideration. I did keep the non-doubled version in consideration for a while; however, comparing that to the doubled version led me to remove it, as I didn’t want to compromise the small details.
Choosing A Colour Palette
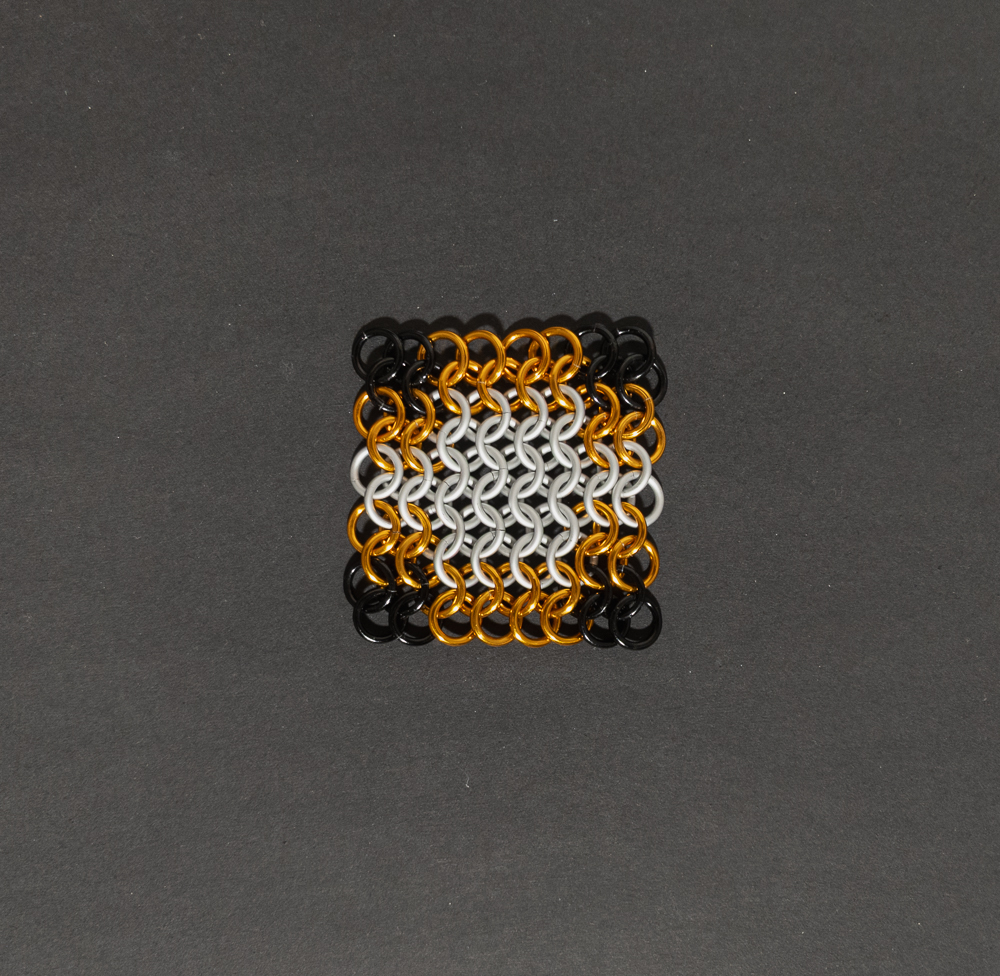
With my sprite now chosen, it was time to convert the colours to what I could buy from The Ring Lord. Previously, I did it by sight, guessing what ring would be a good match for a source colour, taking the retailer image into paint, isolating a colour using the colour picker, and applying it using the paint can, resulting in a rough colour approximation. Being a highly manual process, I didn’t want to repeat this every time I designed an inlay, so I started Pixel Art Helper (still under development). I used this tool to create a palette of Ring Lord Rings by averaging the colour of all the non-white pixels in the image for every ring colour they had available. Using that palette, I automated the process of finding the closest colour available in the palette for each colour in the picture and creating a new image with those colours applied. It also automates resizing images without interpolation and includes tooling to estimate project resource requirements and pricing.
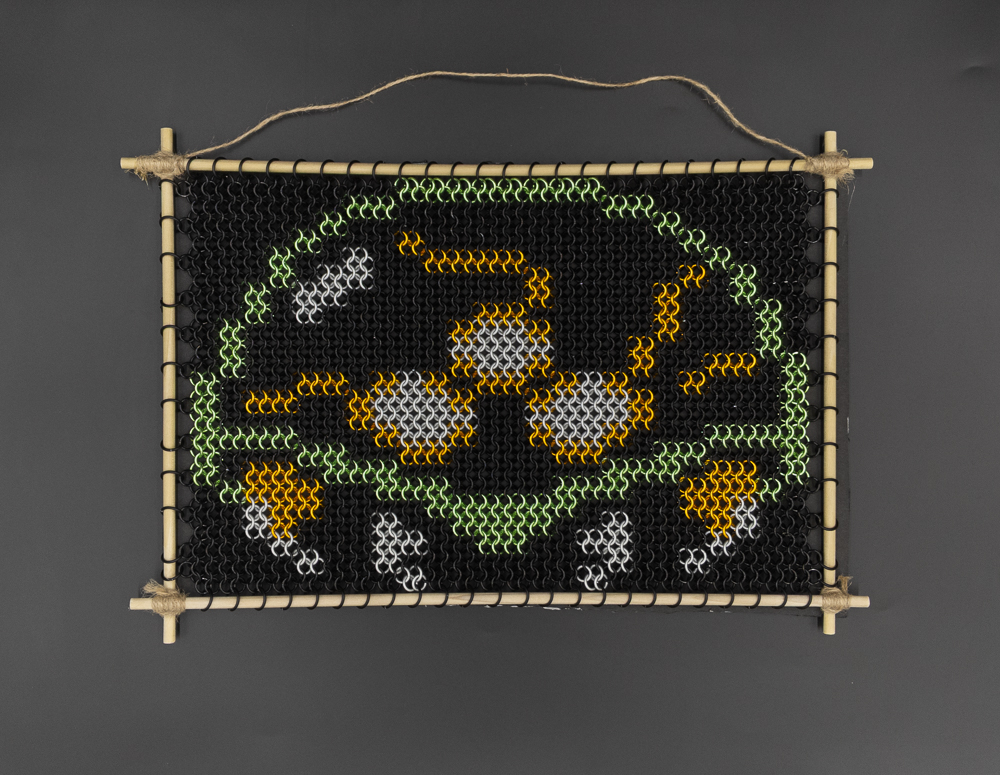
Using my new tooling on the Metroid sprite ended with this this image and this pattern. Unfortunately, the colour of the background and the fangs were too similar and had the same closest Ring Lord colour. To solve this issue and improve contrast, I created these palette swaps, which greatly improved post-palette conversion contrast (as shown here). Out of these, I went with the black palette swap as it was my favourite.
Making the Inlay
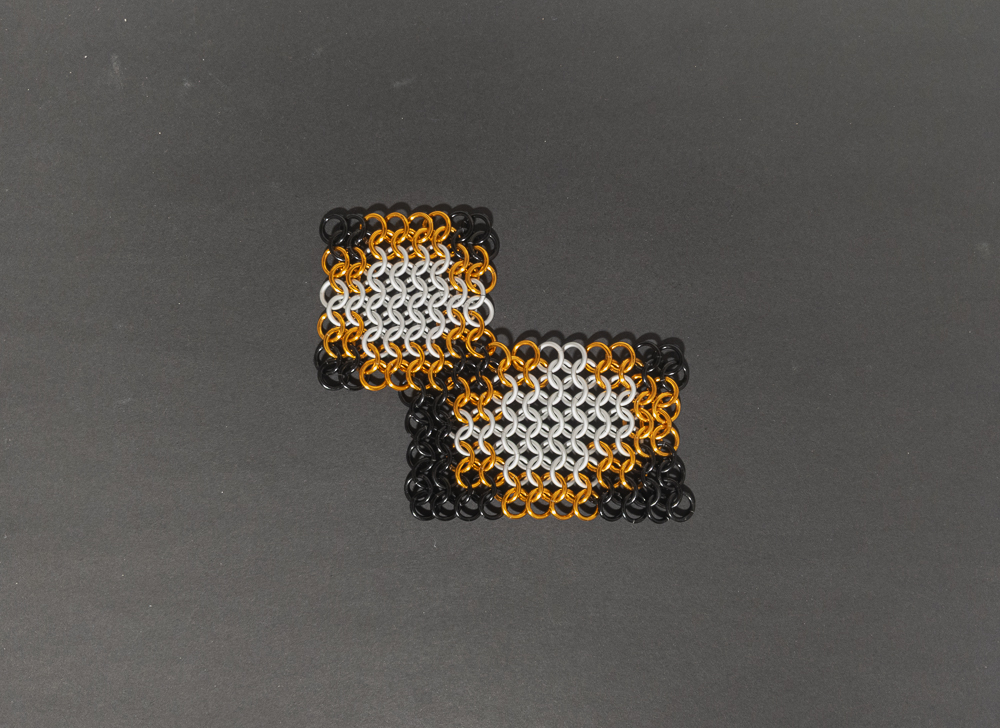
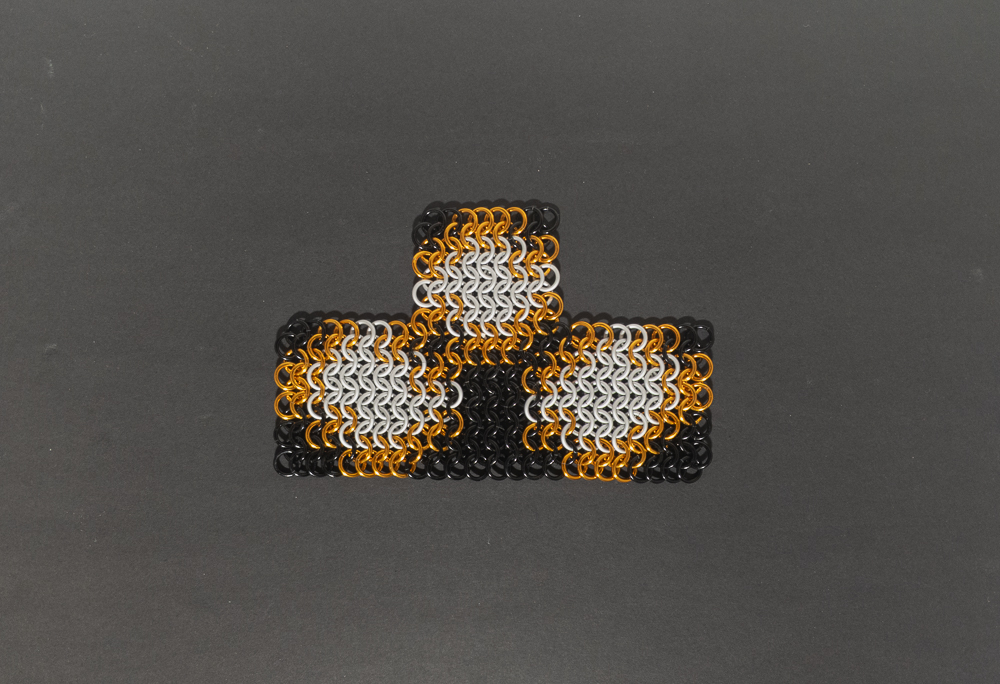
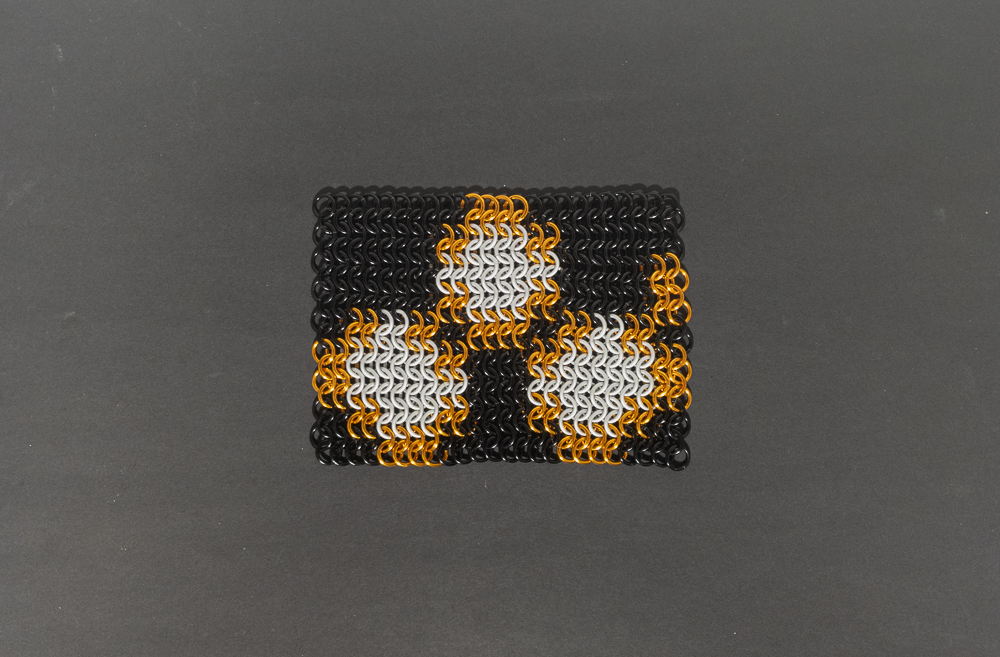
Being made from European 4-in-1, constructing it is trivial. Similar to the previous inlay, most of the construction challenge came from ensuring I followed the pattern correctly. I primarily relied on three techniques to ensure each ring placed was correct. First, working in chunks around landmarks (easily identifiable clusters of rings) ensures that you get appropriate breaks between activity types, allows you to check more frequently, and the landmarks are very helpful for the techniques. Second, count the rings and lay them out in the order you need to add them in before adding to the weave. With this, you ensure that you don’t add rings to the wrong place, so long as you properly check the initial allocation (the landmarks from the previous step are very helpful here). Third, recheck that you are adding rings correctly to the weave. I suggest small-scale checks every few chunks, where you count the number of rings between the landmarks on your work and your pattern, and periodically take a step back to see if it looks right to you. These techniques can make the size of any project manageable when thought out and applied.
Being made from anodized aluminum added a new challenge, more visible scratches/dents. Since the colour is only a thin layer coating the ring, it will come off if handled too roughly. At the start since I hadn’t worked with anodized aluminum for a while I was a bit too rough and scratched a few rings, resuling in needing to replace a few, however I found that adding a few layers of masking tape on the jaws of my right plier (the one I exert the most force with) helped me avoid scratching the rings until I got better at being more gentle. I recommend masking tape to minimize cleaning when you remove it. However, if you do it, you will need to reapply it frequently.
Additionally, I noticed a few quality issues: some rings were pre-scratched, others had cutting errors, leaving a lot of aluminum visible even with the best closure, and the colour of the black rings was not entirely consistent. While the extra rings provided in the bags do ensure you have enough good rings, vigilance is required to filter out lower-quality rings. All together, the result still looks quite nice, and shouldn’t be too hard to replace/rotate a few rings for the occasional slip-up.
New Photography Equipment
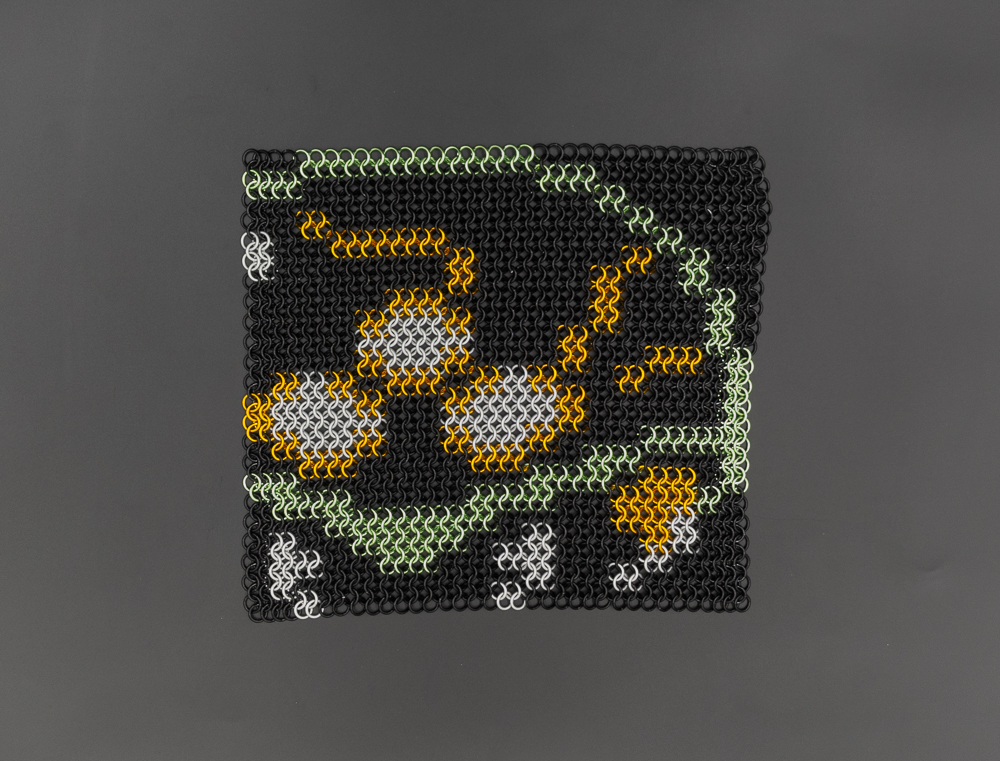
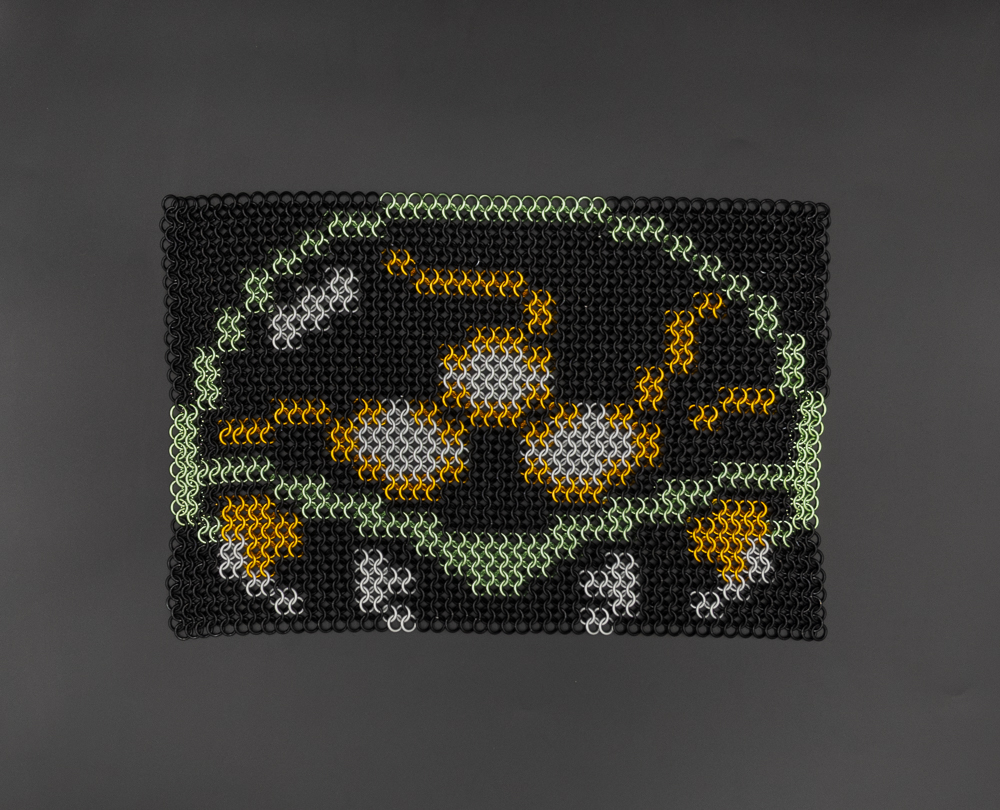
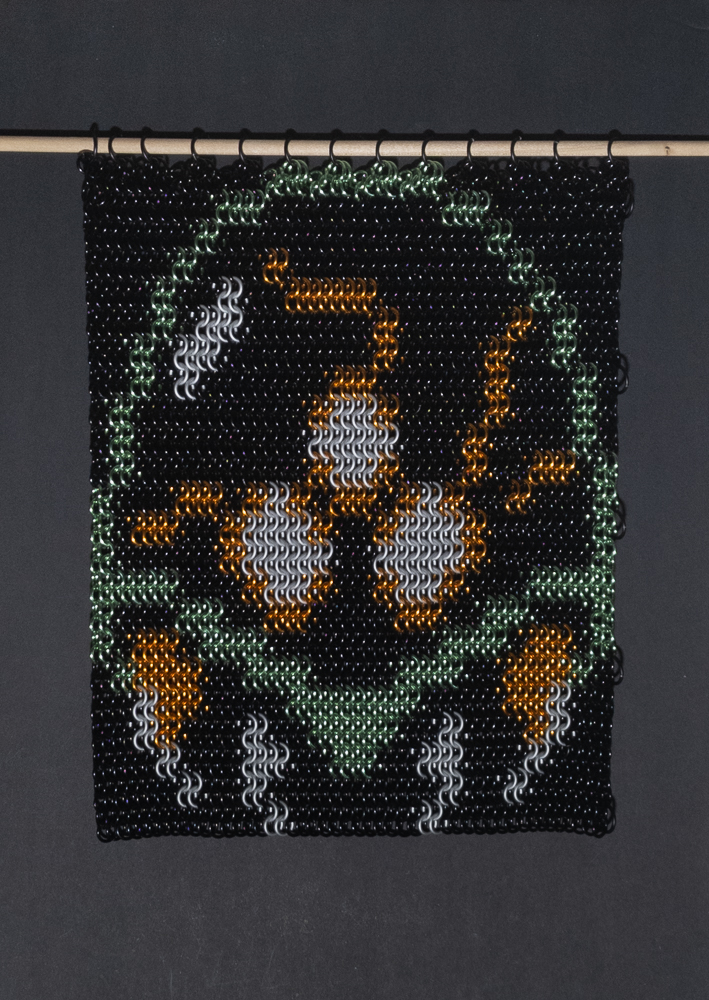
Being a larger inlay meant that this was a fairly large item. Given that I designed my current photography setup around taking photos of weave samples, this project exceeded what I could comfortably shoot with it. Thankfully, a friend of mine helped me get an old light tent used for commercial photography. After some initial setup, making space for it, and a bit of a learning curve, I was able to take some great photos with it (the non-wall shots starting here and this). With this in my photography toolkit, I look forward to all the new and improved shots I can take and how much better they will be as I get more experienced using it and solve a few small problems.
Framing the Inlay
Unfortunately, when hung by just the top, the weave undergoes quite severe horizontal compression (as shown here) due to the weight of the weave pulling it down, which pulls the rings closer. For the same reason, you can’t just hold the ends of the weave apart at the top (as shown here). At first, I thought about just adding dowels to the sides, unless I could add them in a way that ensured they would stay at a 90-degree angle, the weight of the weave would drag them in. Seeing that convinced me that I needed to make a square frame.
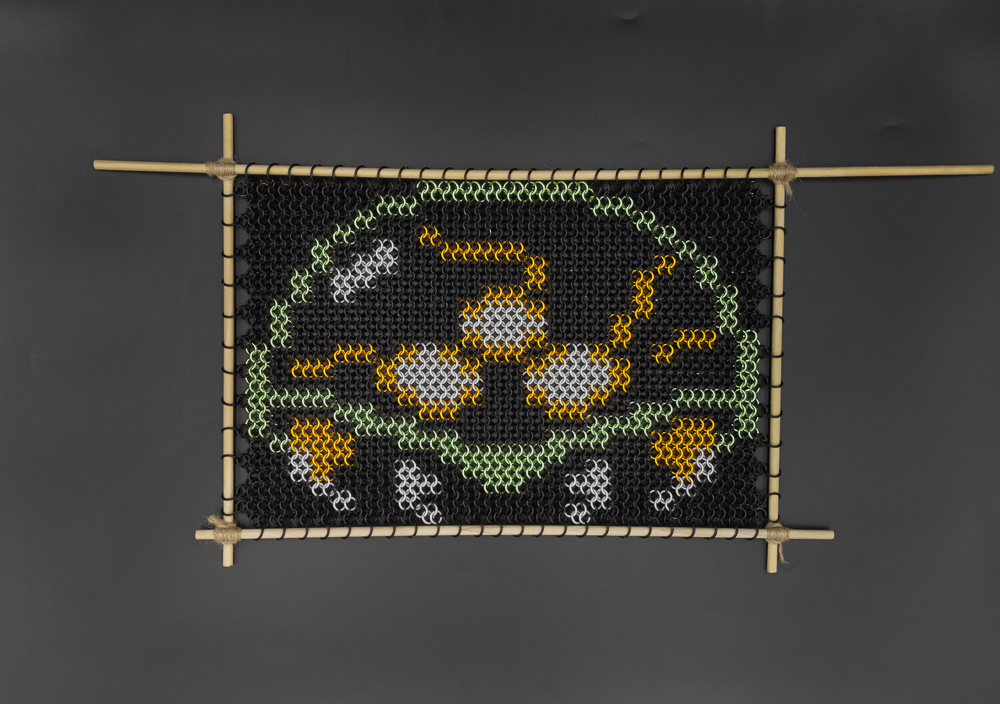
Since I already had a length of dowel on hand to hang the weave, I thought about how to construct a frame using it. I didn’t place much faith in my ability to glue it square, given that I would need to hold it under tension and cylinders stacked on their sides have very little room to bond. I then thought to tie the corners together in a knot. I looked up the knot best suited for joining two logs at a right angle and found the lashing knot on Animated Knots, whose example image was exactly what I was trying to do.
I used some string I had at home and found that the rods would easily slide out. To make the idea work, I needed to use something better than a slick cotton string. I decided on jute twine after searching the internet for advice. The knots were holding much better now, though they were still a bit slippery. To solve this, I roughed up the wood with sandpaper before tying the knot to improve the grip. After roughing it up, the knots help superbly. I could still move a rod, but it took considerable force.
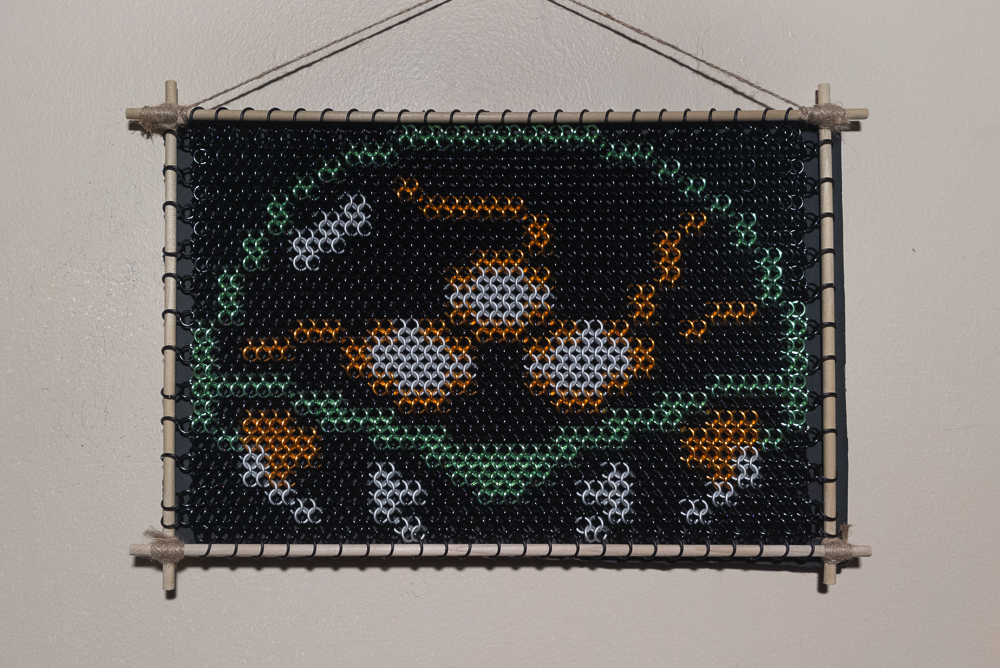
I coated the back of the knots in contact cement, as I had concerns about them fraying, and to ensure they stayed in place on the dowel. Now I had a sturdy frame holding my inlay under tension. When I hung it up, I noticed how much of the inlay I could see through. It still looked nice, but it was a bit distracting, so I bought some black foam board to attach to the back. I attached the foam board using hot glue for the following reasons: it allowed for more setting time, it would be easier to remove the backing, and the thicker glue worked better on a non-flat surface.
All put together, I have a rustic-looking frame that has room for polish, but it still looks quite good and doesn’t detract from the inlay. The fundamental idea is solid. I have the resources to polish it, making it look even better.
Lessons Learned
This project provided a helpful refresher on working with anodized rings and large-scale projects. The new method of choosing a colour palette is much simpler, allowing for more testing than ever before. The refinements in technique for ensuring my rings are accurate at a larger scale are also improvements. However, I also need to keep a closer eye out for the quality of rings I add to the weave and take a bit more care in how I add them; although I can go back and replace any low-quality rings, so there is no permanent harm. In my opinion, the biggest lesson is regarding the need for a frame; adding the frame took a considerable amount of time and created the need for a backing. Choosing an inlay that looks good stretched, rotating it by 90 degrees, and expanding more horizontally than vertically, are ideas I plan on testing to avoid making more frames.
Regarding the frame, while it turned out nice and will get to great, there are a few lessons I want to remember for next time. First, mark the material for all planned cuts before making any cuts. Otherwise, cuts can go off plan. Second, try to cut foam boards with something other than scissors. Third, when setting the hanging portion of the frame, take care to keep it closer to the wall; if it is too far away, the frame will not lie flush with the wall. Lastly, incorporate frames in the schedule; it takes time to acquire the materials and make one.
Conclusion
Overall, I consider this to be a success. Even if I took no steps to improve this, I have a product that I can be fairly proud of, and that looks wonderful. Realistically, any non-minor problem is barely noticeable outside of close examination by a knowledgeable viewer; however, I plan on improving it for my own enjoyment. While the frame was quite rushed, it turned out fairly nicely. Overall, I enjoyed working on this, and I will enjoy owning it and adding that final polish. I hope this inspires you to start your own chainmail project, whether that be an inlay or anything else.
Pictures
Flat
Hung Up
In Progress
Design, Color Choice & Patterning Reference
Original Metroid Sprite
sprite obtained from Spriters Resource as uploaded by Mister Mike

Super Metroid Sprite
(sprite obtained from Spriters Resource as uploaded by Deathbringer)
![]()
Non-Doubled Super Metroid Sprite Patterned
![]()
Doubled Super Metroid Sprite Patterned
![]()
Orignal Metroid Sprite Palette Converted

Orignal Metroid Sprite Palette Converted Pattern
Orignal Metroid Sprite Palette Swaps


Orignal Metroid Sprite Palette Swaps Palette Conversion


Why I Made a Frame
Why Did It Shrink:
Weight There’s More: